Showing posts with label easy recipe. Show all posts

Monday, September 14, 2020

Easy Fig Jam

This fig jam is so easy to make! I love figs, they are sweet and have a delicate flavor that is often compared to honey, and when made into a jam their natural and fragrant qualities intensify, making them great at complementing savory dishes like chicken, lamb, cheese plates, charcuterie spreads, sweet and savory flatbreads, and my new favorite as stuffed inside of challah for the new year!
Easy Fig Jam ~ The Dreams Weaver
What you will need:
3 pounds figs in quarters 
2 cups sugar
1 lemon zested and juiced

Directions:
Combine all 3 ingredients in a saucepan. 
Bring to a simmer over medium-low heat and stir constantly. Cover the pan and let simmer for 1 hour, stirring occasionally. 
Let cool and place in an airtight container in the fridge for up to 2 weeks. 

Fig jam filled challah:
Start with my challah dough
Portion out about half the dough and cut the ball into 8 equally sized pieces, roll into balls and flatten slightly. 
Fill each disc with about a tablespoon worth of jam and seal in. 
Arranged the balls into a greased round or loaf pan. 
Easy Fig Jam ~ The Dreams Weaver
Let the dough rise according to your challah dough recipe, or my recipe mentioned above!
Easy Fig Jam ~ The Dreams Weaver
Enjoy!

 photo signature_zpsf75b5071.png

Sunday, September 6, 2020

Blueberry Muffin Tops

These muffin tops are so easy to make and can be made with different variations of fresh {or even freeze dried} fruit. They are the best part of the muffin!
Blueberry Muffin Tops ~ The Dreams Weaver
What you will need
1 1/2 sticks butter, softened
3/4 cup granulated sugar
1 large egg
1 1/2 cups all-purpose flour
3/4 tsp baking soda
3/4 cup buttermilk (add 1 tbsp vinegar to milk to make buttermilk)
2 tbsp orange juice
1 cup blueberries
1 cup confectioners' sugar

Blueberry Muffin Tops ~ The Dreams Weaver
Directions
Preheat oven to 425°F.
Line 2 baking sheets with parchment.
Cream together the butter and granulated sugar in an electric mixer. Add the egg and beat. add the flour to the butter mixture and mix until combined.
In a separate bowl, dissolve the baking soda in the buttermilk. Add the buttermilk mixture to the batter and mix well.
Toss 1 tbsp flour with the blueberries in a bowl.
Using a spatula, fold the blueberry mixture into the batter until combined.
Scoop about 1/4 cup of the dough onto the lined baking sheets, spacing them 2“ apart. Bake until lightly browned, about 11 minutes. 

Blueberry Muffin Tops ~ The Dreams Weaver
Transfer the muffin tops to a rack set over a baking sheet to cool completely.
In a small bowl, combine the confectioners' sugar and orange juice and mix well. Drizzle the glaze over the cooled muffin tops and let set. 


Enjoy!
Blueberry Muffin Tops ~ The Dreams Weaver

 photo signature_zpsf75b5071.png


Sunday, April 26, 2020

Sesame Cauliflower

This quarantine has me missing my favorite Chinese take-out dish of sesame chicken! This recipe I made using cauliflower, but can easily be done with the original sesame chicken version. Just dice up some boneless and skinless chicken. We got a head of cauliflower on our last stock up grocery trip 2 weeks ago, and totally forgot about it, but it looks just as good!
Sesame Cauliflower ~ The Dreams Weaver
What you will need:
Cauliflower:
1 cup flour
1/2 tsp garlic powder 
1/2 tsp onion powder 
1/2 tsp kosher salt 
1/2 tsp freshly ground black pepper 
1 cup milk or almond milk
1 head cauliflower, cut into bite-size pieces 
Nonstick cooking spray, for the baking sheet 

Sesame Sauce:
1/3 cup low-sodium soy sauce, or coconut aminos
2 tbsp honey 
tbsp toasted sesame oil 
tbsp rice wine vinegar or apple cider vinegar 
tbsp cornstarch 
tbsp sesame seeds, plus more for garnish 
2 tsp grated fresh ginger, or 1 tsp ground ginger
1 tsp garlic powder

Directions:
For the cauliflower
Place a baking sheet in the oven and preheat to 425°F. (If your cauliflower is large, preheat 2 baking sheets.)
Whisk the flour together with the garlic powder, onion powder, salt and pepper in a large bowl. Whisk in the milk and 1/4 cup water until smooth. 
Sesame Cauliflower ~ The Dreams Weaver
Toss the cauliflower in the mixture until evenly coated. Remove the baking sheet from the oven and spray with nonstick cooking spray. Spoon the cauliflower into the baking sheet with a slotted spoon, leaving any excess sauce behind in the bowl. (Do not overcrowd the baking sheet or the cauliflower will steam and not become crispy; you may need to bake in batches or use two baking sheets.) Bake the cauliflower for 20 minutes.
Sesame Cauliflower ~ The Dreams Weaver


For the sesame sauce
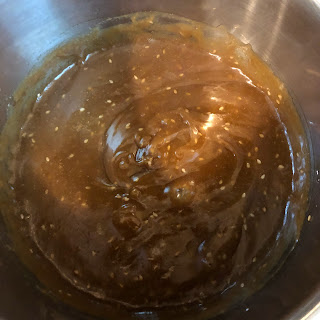
Put the soy, honey, sesame oil, vinegar, cornstarch, sesame seeds, ginger,, garlic and 1/2 cup water in a medium saucepan over medium heat. Whisk together thoroughly. Bring to a boil, then reduce the temperature to medium-low and let simmer, stirring frequently, until the sauce becomes glossy and thick, about 2 minutes. 
Sesame Cauliflower ~ The Dreams Weaver
Remove the cauliflower from the oven and toss with half of the sesame sauce. 
Sesame Cauliflower ~ The Dreams Weaver
Return the cauliflower to the oven until dark and glossy, about 5 to 8 minutes. Remove to a serving bowl and drizzle with more sauce. Add sesame seeds over the top and serve immediately.

Enjoy!

 photo signature_zpsf75b5071.png

Friday, March 13, 2020

Spinach Banana Waffles

Most toddlers, including my son, are not eating enough vegetables per day. Fruit and carbs for him are no problem, but eating raw or cooked vegetables for him not in his pouches is near impossible.

This simple recipe made with only a handful of ingredients, including a vegetable, can be ready in minutes.  The recipe contains no gluten and is packed with protein and nutrients like iron and vitamin K.

I usually make a batch of these and freeze a few in saran wrap to have them on hand for future meals.

Spinach Banana Waffles ~ The Dreams Weaver

What you will need:
2 eggs
1 1/2 cup spinach raw
1 medium banana
1/2 cup oats
Dash of vanilla and cinnamon

Instructions
Heat waffle iron
In a blender, blend all ingredients until well combined (typically takes 1-2 minutes)
Pour batter into the pre-heated waffle iron
Close iron and cook until waffle slightly browned and cooked through (typically about 5 minutes)
Optional: Top with Greek yogurt, syrup, or fruit
 photo signature_zpsf75b5071.png

Tuesday, October 24, 2017

Chicken & Butternut Squash Crockpot Dump

As it starts to get cold out, my crockpot is always on standby for easy weeknight meals. I love coming home to the smell of something warm cooking away in the kitchen all day knowing I didn’t have to spend hours prepping or standing over the hot stove. I know my dog on the other hand is smelling our dinner all day and can’t even get a taste of it.

This recipe is super easy and full of flavor. No prep needed other than chopping, dumping, and forgetting. {I don’t know how much forgetting is happening, as I think about dinner all day at work when the crockpot’s going!}

Chicken & Butternut Squash Crockpot Dump ~ The Dreams Weaver

What you will need:
6 boneless, skinless chicken thighs (about 1 ½ pounds total)
1 (1 ½ - 2 lb.) butternut squash, cubed
2 Tbsp. balsamic vinegar
4 cloves garlic, minced
1 Tbsp. sage
Pinch of each salt and pepper

Combine the chicken, butternut squash, vinegar, garlic, sage, salt, and pepper in your crockpot.
Cover and cook on low for 4-6 hours.
Chicken & Butternut Squash Crockpot Dump ~ The Dreams Weaver

Enjoy!

 photo signature_zpsf75b5071.png

Wednesday, October 18, 2017

Witch Finger Cookies

I made these little severed fingers last year for my company's Halloween bake-off and won! They were a great hit, and everyone loved the taste of them in additional to their gruesome look!

What you will need
2 cups all-purpose flour 
½ teaspoon baking powder 
1/4 teaspoon fine salt 
½ cup (1 stick) unsalted butter, at room temperature 
1 cup sugar 
1 large egg, at room temperature 
1 teaspoon pure vanilla extract 
28 large sliced almonds 

½ cup raspberry jam 


Preheat the oven to 325°F. 


Spray a rimmed baking sheet with vegetable oil cooking spray or line with a silicone baking mat. Set aside.


In a medium bowl, whisk together the flour, baking powder and salt. Set aside.


In the bowl of a stand mixer fitted with the paddle attachment, beat the butter and sugar together until light and fluffy, scraping down the sides of the bowl with a spatula as needed, about 2 to 3 minutes. Beat in the egg and vanilla until smooth. Gradually beat in the flour mixture until a dough forms.


Using about 1 
½ tablespoons of dough at a time, roll the dough between your palms into 5-inch-long fingers about ½-inch thick. Firmly press a sliced almond into the end of each finger to make fingernails. Make several horizontal cuts, about 1/4 inch deep and ½ inch long, in the center of each finger to make knuckles. Press the dough on either side of the cuts to shape the knuckles. Arrange the fingers on the prepared baking sheet and bake until light golden, 16 to 18 minutes. Transfer the fingers to a wire rack and cool completely.


In a small saucepan, heat the jam over low heat until warm, about 2 minutes. Dip the blunt ends of the fingers in the warm jam and arrange on a platter.

Enjoy!


Wednesday, April 5, 2017

Individual Chicken Pot Pie

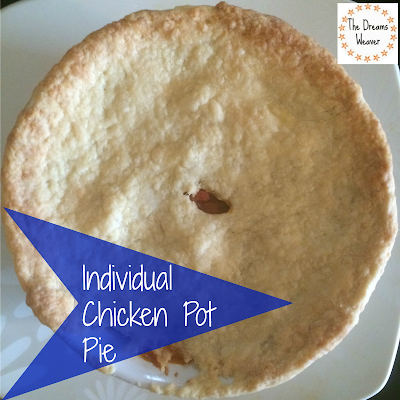
I love anything that is cute and individual portion sized. That is why I decided to make chicken pot pie in little ramekins instead of one big pot pie. They are perfect for a dinner party, or for just my husband and I and freeze the rest for easy dinners!
The Dreams Weaver ~ Individual Chicken Pot Pie
What you will need:
3 whole (6 split) chicken breasts
3 tablespoons olive oil
Kosher salt
Freshly ground black pepper
Paprika
5 cups chicken stock (or water with bouillon cubes or consommé added)
½  stick unsalted margarine
2 cups yellow onions, chopped (2 onions)
2 cloves garlic
¾ cup all-purpose flour
2 cups medium-diced carrots
1 cup button mushrooms sliced
1 head broccoli cut into florets 
1 (10-ounce) package frozen peas (2 cups)
1 ½ cups frozen small whole onions (optional)
½ cup minced fresh parsley leaves

For the pastry:

Pie dough (recipe here) or any store-bought pastry or pie dough sheets
The Dreams Weaver ~ Individual Chicken Pot Pie

Place the chicken breasts in a cast iron skillet and rub them with olive oil. Sprinkle generously with salt, pepper, and paprika. Cook for 12-15 minutes, or until cooked through. Set aside until cool enough to handle. 

The Dreams Weaver ~ Individual Chicken Pot Pie
Cut the chicken into large dice. You will have 4 to 6 cups of cubed chicken.
The Dreams Weaver ~ Individual Chicken Pot Pie
In a small saucepan, heat the water (or stock) and dissolve the chicken consommé flavoring in the water. 
In a large pot or Dutch oven, melt the margarine and sauté the onions over medium-low heat for 10 to 15 minutes, until translucent. Add in the carrots and cook for another 5 minutes.
The Dreams Weaver ~ Individual Chicken Pot Pie
Add the flour and cook over low heat, stirring constantly, for 2 minutes. 
The Dreams Weaver ~ Individual Chicken Pot Pie
Add the hot chicken stock to the sauce. Simmer over low heat for 1 more minute, stirring, until thick. Add 2 teaspoons salt, and ½ teaspoon pepper. Add the cubed chicken, peas, mushrooms, broccoli, onions and parsley. Mix well.
The Dreams Weaver ~ Individual Chicken Pot Pie
Once the pie dough is made, dump the dough out onto a floured board and knead quickly into a ball. Wrap the dough in plastic and allow it to rest in the refrigerator for 30 minutes.
Preheat the oven to 375°F.

Divide the filling equally among 6 ovenproof bowls. 
The Dreams Weaver ~ Individual Chicken Pot Pie
Divide the dough into 6 pieces and roll each piece into an 8-inch circle. Brush the outside edges of each bowl with the egg wash, then place the dough on top. Trim the circle to ½-inch larger than the top of the bowl. Crimp the dough to fold over the side, pressing it to make it stick. Brush the dough with egg wash and make 3 slits in the top. 
The Dreams Weaver ~ Individual Chicken Pot Pie
Place on a baking sheet and bake for 1 hour, or until the top is golden brown and the filling is bubbling hot.
The Dreams Weaver ~ Individual Chicken Pot Pie
Enjoy!

 photo signature_zpsf75b5071.png

Wednesday, January 14, 2015

Easy Pie Dough

Pie dough is an easy base for many different types of pie recipes. There's apple pie, blueberry pie, pumpkin pie, ice cream pie...I can go on and on about all of the pies out there, but let's get down to pie business. Pie dough is extremely easy to make last minute!

Sorry for the lack in images for this post! I was so excited to make pie dough for the first time that I forgot to snap any! {images coming soon!}

What you will need:
1 1/4 cups all-purpose flour 
1 tbsp. sugar 
1/4 tsp. salt 
8 tbsp. (1 stick) cold unsalted butter, cut into 1/4-inch cubes 
3 tbsp. very cold water 

In a large bowl, stir together the flour, sugar and salt. Using a pastry cutter, cut the butter into the flour mixture until the texture resembles coarse cornmeal, with butter pieces no larger than small peas. Add the water and mix with a fork just until the dough pulls together. 

Transfer the dough to a work surface, pat into a ball and flatten into a disk.  Lightly flour the work surface, then flatten the disk with a rolling pin. Lift the dough and give it a quarter turn. Lightly dust the top of the dough or the rolling pin with flour as needed, then roll out into a round at least 12" in diameter and about 1/8" thick. 

This recipe makes enough dough for one 9-inch single-crust pie, or mini apple pie cookie that I will show you how to make tomorrow! They're dangerously addictive!


 photo signature_zpsf75b5071.png

Monday, July 7, 2014

How To Make Cold Brewed Iced Coffee

No morning is complete without my coffee fix! No matter what season, my coffee of choice is always over ice! I grew up in a coffee family {maybe that’s why I’m on the shorter side!} Coffee is connected to so many moments in my life: the smell of coffee at family breakfasts on the weekend, hanging out at Starbucks with friends, midday iced coffee with my mom and sister, and finally getting my husband to share my love of coffee with me. 

However, when I try to make my own iced coffee from hot brewed coffee, it never tastes quite as good as the iced coffee I get at Starbucks or any other good coffee shop. Hot brewed coffee over ice always tastes watered-down and slightly burnt. 

I think I have found the answer to my problems. I am going to share my secret, an at-home cold brewed iced coffee that is bold and flavorful. 
How To Make Cold Brewed Iced Coffee~ The Dreams Weaver
First, you need to choose a coffee. You want to use a good quality coffee, as the taste will really come through. I used one of my favorites, Starbucks Dark French Roast. 
How To Make Cold Brewed Iced Coffee~ The Dreams Weaver
Once you have course ground your beans, {if you are starting from whole coffee beans like I am} measure out how much coffee you will need and pour it into you container. I used a mason jar since it closes airtight. You are going to want 4 ounces {1/2 cup} for every 1 quart {32 ounces} of water. 
How To Make Cold Brewed Iced Coffee~ The Dreams Weaver
Pour in your filtered or spring water. 
How To Make Cold Brewed Iced Coffee~ The Dreams Weaver
Give the coffee mixture a good stir to combine everything. 
How To Make Cold Brewed Iced Coffee~ The Dreams Weaver
Screw the cover back on to your mason jar. You want it to be air tight, if using a container without a lid cover with saran wrap. Let the coffee sit for at least 12 hours and up to 24 hours. 
How To Make Cold Brewed Iced Coffee~ The Dreams Weaver
After 12 hours it's time to strain the coffee grounds out. {If you let the coffee sit longer, the final result will be more bitter and bold.} You can use a cheese cloth or a fine strainer like I did to strain the coffee. 

To strain, place your strainer over a bowl or a pitcher and pour the coffee mixture through. The cold brewed coffee will filter through and the coffee grounds will stay in the strainer. 

The cold brewed coffee will last in a sealed container in your fridge for up to a week!

Save those coffee beans!  I have an easy DIY coffee sugar scrubyou can make with them later in the week! 
How To Make Cold Brewed Iced Coffee~ The Dreams Weaver
Now it's time to pour some of your cold brew over ice.

Tip: Make some coffee iced cubes so your coffee never gets watered down! 
How To Make Cold Brewed Iced Coffee~ The Dreams Weaver

You can drink it black, as cold brewed coffee is naturally sweeter than hot brewed coffee, it will naturally taste sweet. 
How To Make Cold Brewed Iced Coffee~ The Dreams Weaver
Or, add some milk and sugar for even more decadence.
How To Make Cold Brewed Iced Coffee~ The Dreams Weaver
Enjoy!

 photo signature_zpsf75b5071.png