Showing posts with label easy dinner. Show all posts

Sunday, March 20, 2022

Pumpkin Pasta

We love east weeknight meals in our house, and my son loves his Mac and cheese, or anything with cheese and pasta in it. This is the perfect elevated ‘Mac and cheese’ type dinner, and what’s even better there some pumpkin in it!
Pumpkin Pasta ~ The Dreams Weaver
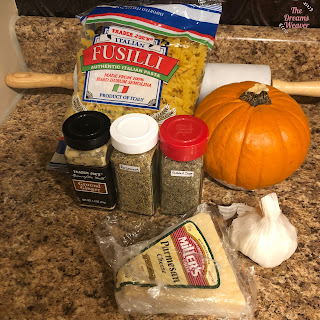
What you will need:
1 pound fusilli pasta
½ cup extra-virgin olive oil
1 tsp sage
2 tsp rosemary 10 tbsp (1 stick plus 2 tablespoons) unsalted butter
1 tsp ground ginger
1-2 cloves garlic, minced
15 oz pumpkin puree {recipe here} or 1 15-ounce can pure pumpkin puree
2 tsp dark brown sugar
¾ cup finely grated Parmesan
Salt & black pepper
Pumpkin Pasta ~ The Dreams Weaver
Directions:
In a large pot, bring 6 quarts of water to a rolling boil. Add a generous amount of salt. Add the pasta to the pot and stir so it doesn’t stick to the bottom as it cooks. Cook the pasta according to package instructions, 8 to 10 minutes. Reserve some of the pasta cooking water. Drain the pasta in a colander and hold it there until the sauce is finished.

While the pasta is cooking, heat the oil in a large, high-sided skillet over medium heat until it shimmers. Add 8 tablespoons (1 stick) of butter until it starts to turn light brown. Add the ginger and garlic and stir until fragrant, about 30 seconds. add in the sage and rosemary. Add the pumpkin, sugar and some of the reserved pasta water. Stir in about ½ cup of Parmesan. Season with salt and pepper to taste. Stir in the remaining 2 tablespoons of butter. Add the cooked pasta to the skillet and warm gently, tossing to coat the pasta with the sauce.

Top with the remaining Parmesan. 

Enjoy!
photo signature_zpsf75b5071.png

Tuesday, January 4, 2022

Alfredo Sauce

Alfredo is the ultimate comfort meal, especially in the winter! This recipe is so easy to make and can be used multiple ways throughout the week for easy meals!
Alfredo Sauce ~ The Dreams Weaver
What you will need: 
1 stick butter
1 cup heavy cream
Salt and pepper
2 cups freshly grated Parmesan
Pasta cooking water, as needed 

Directions:
In a saucepan or skillet, warm the butter and cream. (This week I did not have heavy cream in the fridge, so substituted for whole milk and 1 tbsp flour and worked out perfectly!)

Season with salt and pepper. Add the Parmesan and stir until melted. 

Toss to combine, thinning with pasta water if necessary.

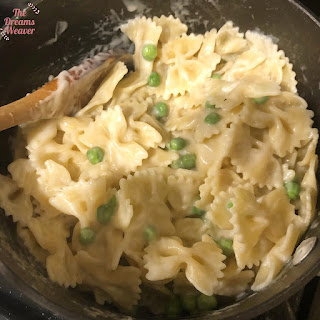
This sauce can be used for fettuccine Alfredo, or farfalle pasta and peas! I tossed frozen peas into the pasta with sauce and just heated through for a few minutes.
Alfredo Sauce ~ The Dreams Weaver
I also used this sauce as a base for a white mushroom pizza. Either make pizza dough recipe here (or store bought) roll out, schmear a generous amount of Alfredo sauce, sprinkle with mozzarella cheese and sautéed mushrooms!
Alfredo Sauce ~ The Dreams Weaver
Enjoy!

photo signature_zpsf75b5071.png

Monday, February 1, 2021

Eggplant Parmesan

My love for eggplant Parmesan started when my father would order it at the dairy restaurant when I was little. I would always eat some of it and really liked it. 
While this eggplant Parmesan doesn’t have as many layers as the restaurant would serve us {we’re only 2 of us in our house and didn’t need a huge dish} you can definitely increase the amount used and make a bigger portion!
Eggplant Parmesan ~ The Dreams Weaver
What you will need 
2 medium eggplants, cut into ½” round slices 
Salt 
5 cups panko breadcrumbs 
1 tbsp dried basil 
1 tbsp dried thyme 
Ground black pepper 
Vegetable oil for frying 
AP flour for dredging 
6 large eggs, beaten 
2 tbsp whole milk 
Olive oil, as needed 
1 jar marinara sauce 
 ⅔ cup grated Parmesan 
1 pound grated mozzarella 
Eggplant Parmesan ~ The Dreams Weaver
Directions
Arrange the eggplant slices on a board or baking sheets and sprinkle generously all over with salt. Set aside to let the bitter juices weep from the eggplant, about 1 hour. 

Rinse the eggplant in cold water and pat dry with paper towels. 

In a bowl, whisk together 1 ½ teaspoons salt, breadcrumbs, basil, thyme, and season with pepper. 

Place the flour in a plate or bowl. In another medium bowl, whisk the egg and milk together. Dredge an eggplant slice in the flour first, then in the egg, and lastly dredge it in the breadcrumb mixture. Shake off any excess breading and transfer the eggplant to a baking sheet. Repeat with the remaining eggplant slices. 

In a large skillet, pour the oil to about ½” deep. Heat the oil over medium heat. 

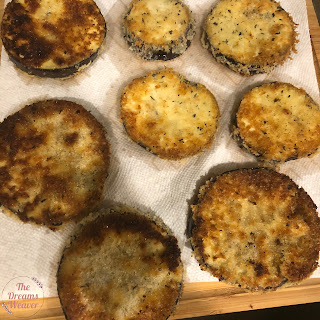
Working in small batches, fry the eggplant slices, turning once, until golden brown, about 3 minutes per batch. Using tongs, transfer to a paper towel-lined baking sheet and season with salt to taste. Repeat with the remaining eggplant. 
Eggplant Parmesan ~ The Dreams Weaver
Preheat the oven to 400°F. Brush a baking dish with olive oil. Cover the bottom of the baking dish with ⅓ of the marinara sauce and arrange half of the eggplant over the sauce. Cover the eggplant with another ⅓ of the sauce. Spread half of the Parmesan and half of the mozzarella over the sauced eggplant. 
Eggplant Parmesan ~ The Dreams Weaver
Repeat with the remaining eggplant, sauce, Parmesan, and mozzarella. Bake until just beginning to brown, about 30 minutes.
Eggplant Parmesan ~ The Dreams Weaver
Enjoy!
Eggplant Parmesan ~ The Dreams Weaver


photo signature_zpsf75b5071.png

Monday, January 18, 2021

Salmon Croquettes

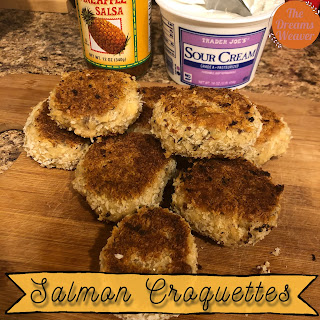
Salmon croquettes are pan fried and packed with so many great flavors. These make a quick and easy weeknight meal and are delicious with sour cream, salsa, marinara, or even tartar sauce! 
Salmon Croquettes ~ The Dreams Weaver
What you will need
½ cup Panko 
¼ cup flour
15 ounce canned salmon 
½ tsp garlic powder 
½ tsp basil 
½ tsp salt 
¼ tsp pepper 
1 egg, lightly beaten 
¼ cup mayonnaise 
Optional filling: string cheese
Optional toppings: sour cream, salsa 
Salmon Croquettes ~ The Dreams Weaver
Directions
Add Panko and flour to a bowl and mix. Add canned salmon, garlic, salt, pepper, egg, mayonnaise, basil. Mix until incorporated. 

Heat oil in a large skillet over medium high heat. 

Shape into 6-8 patties and add about ¼ of a string cheese to the center of the patty and flatten slightly. Roll the patty in additional Panko. 

Add patties to the skillet and cook for 2-3 minutes on each side or until golden brown.

photo signature_zpsf75b5071.png

Monday, October 12, 2020

Marinated Grilled Flank Steak

This recipe is so easy to make, which is why I love it so much! Once you mix the marinade together and set it in the fridge, it does all of the work for you.
Marinated Grilled Flank Steak ~ The Dreams Weaver
What you will need: 
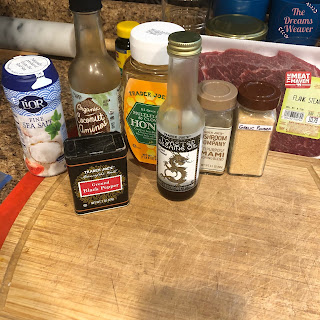
1-2 lb flank steak (have also done with London broil) 
1/2 cup coconut aminos or soy sauce 
1/4 cup toasted sesame oil 
 2 tsp garlic powder 
1 tbsp honey 
1 tsp umami seasoning blend 
Salt & pepper to season 
Marinated Grilled Flank Steak ~ The Dreams Weaver
Directions: 
Whisk together soy sauce, toasted sesame seed oil, garlic powder, honey, umami seasoning, salt, and pepper. 
Marinated Grilled Flank Steak ~ The Dreams Weaver
Marinade overnight (or at least 4-6 hours) in a ziploc bag. 
Marinated Grilled Flank Steak ~ The Dreams Weaver
Preheat grill pan in high heat. 
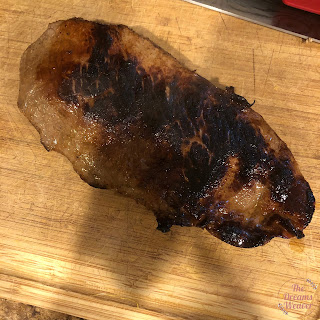
Pat down the meat to make sure there’s no excess marinade and grill about 5 minutes per side.
Marinated Grilled Flank Steak ~ The Dreams Weaver
Allow the meat to rest 10 minutes before slicing. 
Transfer reserved marinade to a small saucepan and bring to a boil over high heat. Lower the heat and cook over medium heat until reduced. 
Once the meat has rested, cut thin slices against the grain, plate and drizzle with marinade.  
Marinated Grilled Flank Steak ~ The Dreams Weaver

 Enjoy!

photo signature_zpsf75b5071.png

Tuesday, September 8, 2020

Crockpot Sweet Beer Chicken

There’s nothing better than the smell of warm dinner slow cooking all day as the weather starts to cool down! This chicken is nice and juicy from cooking in the beer mixture all day. 
Crockpot Sweet Beer Chicken ~ The Dreams Weaver
What you will need 
1-2 onions, cut into rounds 
3-4 carrots cut into chunks
4 medium russet potatoes peeled and cut into chunks
1 small bunch celery cut into pieces
1/2 cup brown sugar 
1 and 1/2 tsp salt 
1 and 1/2 tsp chili powder 
1 and 1/2 tsp paprika 
1 tsp garlic powder 
8 pieces bone-in, skin-on chicken
12 oz beer
Crockpot Sweet Beer Chicken ~ The Dreams Weaver
Directions
Oil the the crockpot and place onion rounds on the bottom of crockpot, then add the potatoes, carrots, and celery. 
Crockpot Sweet Beer Chicken ~ The Dreams Weaver
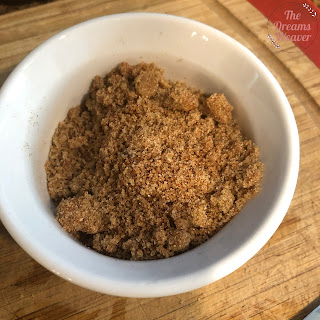
In a bowl, mix together brown sugar, salt, chili powder, paprika, and garlic powder. 
Crockpot Sweet Beer Chicken ~ The Dreams Weaver
Rub mixture all over each piece of chicken. Place chicken on top onions.
Crockpot Sweet Beer Chicken ~ The Dreams Weaver
Pour beer over the chicken. 
Cover and cook on low for 8 hours. 
The chicken can also be made in the oven in a pan covered tightly at 350°F for about 2 hours. 
Enjoy!

Crockpot Sweet Beer Chicken ~ The Dreams Weaver


 photo signature_zpsf75b5071.png

Monday, July 20, 2020

Falafel Air Fried Chicken

This recipe is so easy to make and is a great update on the regular breadcrumb coated chicken! The dry falafel mix has all of the seasoning needed as well. They are even better served with a tahini sauce and a salad on the side, or can even be made like a traditional falafel in a pita. 
Falafel Air Fried Chicken ~ The Dreams Weaver
What you will need:
1-2 lbs. chicken breast (I cut mine in thin strips as chicken fingers)
2 eggs
1 cup all purpose flour
1 cup falafel mix
Spray oil for air fryer
Falafel Air Fried Chicken ~ The Dreams Weaver
Spread out flour on a large plate. 
Whisk the 2 eggs together in a bowl.
Spread out the falafel mix on another large plate. 
Coat each piece of chicken in flour, shake off the excess, then dredge in egg, and finally into the falafel mix. 
Spray the air fryer insert with oil, place the chicken in, and then spray the tops of each chicken piece. 
Fry on the poultry setting for 15 minutes (375 degrees.) if you don’t have an air fryer you can even bake in the oven or fry in a skillet on medium-high heat for 3-5 minutes per side. 

Enjoy!
Falafel Air Fried Chicken ~ The Dreams Weaver

 photo signature_zpsf75b5071.png

Monday, May 4, 2020

Homemade Flour Tortillas

This was my first attempt at homemade tortillas, and they are quite tasty! With Cinco de Mayo coming up, and COVID still looming over, we were not planning another grocery store run for another week or two! Seemed like the perfect time to try to make my own, and they come out so much cheaper and fresher than store bought.
Homemade Flour Tortillas ~ The Dreams Weaver

What you will need:
2 1/2 cups all-purpose flour
1 tsp kosher salt 
3 tbsp vegetable oil 
1 cup very hot water

Directions
Stir together the flour and salt in a bowl. Mix in the oil, then slowly pour in the hot water {not boiling!}, stirring constantly. When the dough comes together, turn it out onto a lightly floured surface. Knead it gently a few times to smooth out the dough. Let the dough rest in an oiled bowl covered with a towel for about an hour.
Homemade Flour Tortillas ~ The Dreams Weaver

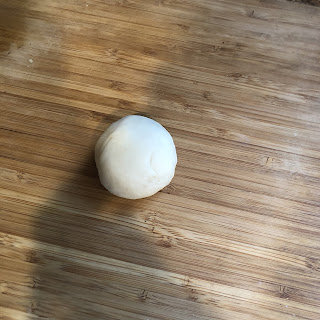
Heat a cast-iron skillet or frying pan over medium-high flame. Section off a piece of dough slightly smaller than a ping-pong ball and roll it out into a 5-inch circle until its extremely thin.
Homemade Flour Tortillas ~ The Dreams Weaver

Cook the tortilla on the dry skillet for about 1 minute on the first side, until it starts to brown a little, then flip it and cook for about 30 seconds on the second side. Remove from the pan and stack onto a towel. As you stack the tortillas, wrap them in the towel while you cook the next ones to keep the warm and pliable.
Homemade Flour Tortillas ~ The Dreams Weaver

Serve with breaded fish, pulled meat, chicken, pico de gallo, guacamole...the possibilities are endless! Whatever combo you choose, don't forget a cerveza or margarita!
Homemade Flour Tortillas ~ The Dreams Weaver

Enjoy!

 photo signature_zpsf75b5071.png

Friday, May 1, 2020

Easy Asian Glazed Corned Beef

Traditional corned beef requires a pot of boiling water, 3 hours, and changing of the salty water. But, with an active toddler that wants my attention, I didn't want to have to stand over the stove and watch that he didn't try and touch the flame.

This recipe only requires the oven and only one pan to wash (or disposable pan to just throw away!)
Easy Asian Glazed Corned Beef ~ The Dreams Weaver
What you will need:
1 (2.5-3 lb) pickled brisket
Glaze
3/4 cup bbq or teriyaki sauce
2 tbsp soy sauce
1 tbsp rice vinegar
2 tbsp honey
1/4 cup brown sugar
1/2 inch fresh ginger, minced or 1 tsp ground ginger
4 cloves minced garlic

Directions:
Preheat oven to 350°F.
Place meat in its sealed bag of pickling liquid into a 9x13-inch pan. 
Add water to the pan until the meat is covered. 
Cover pan tightly with foil; bake for 2.5 hours, until meat is tender. 
Drain water from the pan and set meat aside until cool enough to handle.
While meat is cooling, prepare glaze.
Glaze:
Add glaze ingredients to a bowl and whisk to combine.
Remove meat from bag and drain all liquid. 
Rinse meat under cold water to remove any remaining pickling spices and salt. 
Return to pan and pour half the glaze over meat. Bake uncovered for 15 minutes. 
Remove from oven and pour remaining glaze over meat. Bake for an additional 15 minutes.
To serve, slice meat and spoon glaze/sauce over it.

Enjoy!
Easy Asian Glazed Corned Beef ~ The Dreams Weaver

 photo signature_zpsf75b5071.png

Sunday, April 26, 2020

Sesame Cauliflower

This quarantine has me missing my favorite Chinese take-out dish of sesame chicken! This recipe I made using cauliflower, but can easily be done with the original sesame chicken version. Just dice up some boneless and skinless chicken. We got a head of cauliflower on our last stock up grocery trip 2 weeks ago, and totally forgot about it, but it looks just as good!
Sesame Cauliflower ~ The Dreams Weaver
What you will need:
Cauliflower:
1 cup flour
1/2 tsp garlic powder 
1/2 tsp onion powder 
1/2 tsp kosher salt 
1/2 tsp freshly ground black pepper 
1 cup milk or almond milk
1 head cauliflower, cut into bite-size pieces 
Nonstick cooking spray, for the baking sheet 

Sesame Sauce:
1/3 cup low-sodium soy sauce, or coconut aminos
2 tbsp honey 
tbsp toasted sesame oil 
tbsp rice wine vinegar or apple cider vinegar 
tbsp cornstarch 
tbsp sesame seeds, plus more for garnish 
2 tsp grated fresh ginger, or 1 tsp ground ginger
1 tsp garlic powder

Directions:
For the cauliflower
Place a baking sheet in the oven and preheat to 425°F. (If your cauliflower is large, preheat 2 baking sheets.)
Whisk the flour together with the garlic powder, onion powder, salt and pepper in a large bowl. Whisk in the milk and 1/4 cup water until smooth. 
Sesame Cauliflower ~ The Dreams Weaver
Toss the cauliflower in the mixture until evenly coated. Remove the baking sheet from the oven and spray with nonstick cooking spray. Spoon the cauliflower into the baking sheet with a slotted spoon, leaving any excess sauce behind in the bowl. (Do not overcrowd the baking sheet or the cauliflower will steam and not become crispy; you may need to bake in batches or use two baking sheets.) Bake the cauliflower for 20 minutes.
Sesame Cauliflower ~ The Dreams Weaver


For the sesame sauce
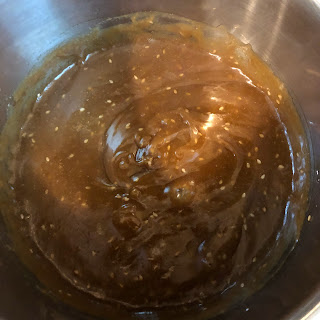
Put the soy, honey, sesame oil, vinegar, cornstarch, sesame seeds, ginger,, garlic and 1/2 cup water in a medium saucepan over medium heat. Whisk together thoroughly. Bring to a boil, then reduce the temperature to medium-low and let simmer, stirring frequently, until the sauce becomes glossy and thick, about 2 minutes. 
Sesame Cauliflower ~ The Dreams Weaver
Remove the cauliflower from the oven and toss with half of the sesame sauce. 
Sesame Cauliflower ~ The Dreams Weaver
Return the cauliflower to the oven until dark and glossy, about 5 to 8 minutes. Remove to a serving bowl and drizzle with more sauce. Add sesame seeds over the top and serve immediately.

Enjoy!

 photo signature_zpsf75b5071.png