Showing posts with label fall. Show all posts

Wednesday, September 29, 2021

Apple Pie Spice

Even though I am totally team pumpkin pie spice, I’ve been loving this homemade apple pie spice! It’s a deliciously festive blend of spices that’s perfect for any fall-inspired baked good, especially challahs. It’s also pretty amazing as a topping for your oatmeal, a latte, or mixing with sugar for the ultimate cinnamon toast!

Spices such as cinnamon, ginger, nutmeg and cardamom come together in this easy homemade Apple Pie Spice. This warm and comforting spice blend can be used for so much more than just apple pies!
Apple Pie Spice ~ The Dreams Weaver
What you will need:
4 tbsp ground cinnamon 
1 ½ tsp ground nutmeg 
½ tsp ground allspice 
1 tsp ground ginger 
1 ½ tsp ground cardamom

Directions:
Combine spices in a small bowl, mix well to combine. Store in a small jar or spice container. {I reuse my Trader Joe’s glass spice jars!}

Enjoy!


photo signature_zpsf75b5071.png

Thursday, January 15, 2015

Mini Apple Pie Cookies

These mini apple pie cookies are made of real pie crust layered with gooey caramel, and a layer of apple pie filling, topped with a flaky and adorable cinnamon sugar lattice crust.

Each and every bite offers the very best part of an actual apple pie, with all of the convenience of a cookie! No utensils or plate required! Seriously the best cookie I’ve ever had! I can't help but want to eat the entire batch~

Mini Apple Pie Cookies~ The Dreams Weaver
What you will need:
1 batch of my pie dough, recipe here, or buy the ready made kind 

1 can of apple pie filling {just enough for a thin layer} 
1 cup of caramel sauce {just enough for a light coating} 
1 egg 
2 tbsp. cinnamon sugar 
A round cookie cutter, any size you like 
Mini Apple Pie Cookies~ The Dreams Weaver 
Lay out half of the pie dough {or 1 sheet if using store bought dough}, sprinkle it with some flour and slightly roll it out.
Mini Apple Pie Cookies~ The Dreams Weaver
Pour some of the caramel sauce onto the crust and evenly spread it around, creating a thin layer of caramel.
Mini Apple Pie Cookies~ The Dreams Weaver
Coarsely chop the apple pie filling into small pieces, you don't want giant chunks in your delicate cookies.
Mini Apple Pie Cookies~ The Dreams Weaver
Top the caramel layer with a thin layer of the chopped up apple pie filling, making sure not to add too much pie filling.
Mini Apple Pie Cookies~ The Dreams Weaver
Roll out the other half of pie dough, the same size as the first sheet, and cut it into thin strips.

Create a lattice crust {just like on a pie} for the top of the pie filling. You can create the lattice,{just like a real pie!} right on top of the filling. Or, you can do what I did, I created the lattice on a floured board and then flipped on top of the filling.
Mini Apple Pie Cookies~ The Dreams Weaver
Now it's time to cut out your pie cookies!
Mini Apple Pie Cookies~ The Dreams Weaver
Once the cookies are all cut, brush the tops of them with some egg wash and sprinkle them with cinnamon sugar.

Place them onto a baking sheet and bake them at 350 degrees for 20-25 minutes, until they’re golden and firm.

Let them cool just a little..
Mini Apple Pie Cookies~ The Dreams Weaver
Now, get ready to bite into the juiciest, chewiest apple pie cookie ever!
Mini Apple Pie Cookies~ The Dreams Weaver
Enjoy!

 photo signature_zpsf75b5071.png

Wednesday, October 29, 2014

Pumpkin Cinnamon Buns

Happy Hump day blogland! I am already counting down the days until the weekend again. My work has a costume contest for Halloween, and Jet (our fur baby) and I are dressing up together. Can anyone guess what we will be? 

We are also having a potluck lunch on Friday at work, so this past weekend I was testing out some new recipes, as well as spending a few hours with our friends and our fur babies getting lost in a corn maze! It was a successful Fall weekend!
I am always looking for new ways to use my pumpkins, and I never get sick of anything pumpkin! The other week I baked challah bread for the first time, and that was the first time I had also ever used yeast. And it was so much easier than I had thought it would be! That is where this recipe comes in. It is very similar to the dough used to make challah bread. I think they were a success, because the hubby devoured most of them the first night I made them. Luckily I was able to take a few photos of them before they vanished into thin air.
Pumpkin Cinnamon Buns~ The Dreams Weaver
These pumpkin cinnamon buns are great to make ahead of time too. You could assemble them at night, let them rise in the fridge and finish in the morning for a weekend breakfast.

What you will need:
Dough:
6 tbsp. unsalted butter
1/2 cup whole milk, warmed (but not over 116 degrees)
2 1/4 tsp. active dry yeast (from 1 .25-ounce or 7 gram envelope yeast)
3 1/2 cup all-purpose flour, plus extra for rolling out
1/4 cup (packed)light or dark brown sugar
1/4 cup granulated sugar
1 tsp. table salt
1/2 tsp. ground cinnamon
1/4 tsp. freshly grated nutmeg
1/4 tsp. ground ginger
2/3 cup homemade pumpkin puree, or canned
1 large egg
Oil for coating rising bowl
Filling:
3/4 cup (packed) light or dark brown sugar
1/4 cup granulated sugar
1/8 tsp. table salt
2 tsp. ground cinnamon
Glaze (optional):
4 oz. cream cheese, softened
2 tbsp. milk
2 cups powdered sugar
Few drops vanilla extract

Pumpkin Cinnamon Buns~ The Dreams Weaver
First, you want to make your dough. Melt your butter in the microwave or on the stove in a saucepan.

Combine the warmed milk, 1-2 tsp. sugar, and yeast in a small bowl and set aside. After five to seven minutes, it should be a bit foamy. 

Pumpkin Cinnamon Buns~ The Dreams Weaver
To the bowl of your stand mixer combine flour, sugars, salt and spices. Add 1/4 cup of your melted butter and stir to combine. Add yeast/milk mixture, pumpkin and egg and mix combined. Switch mixer to a dough hook and run it for 5 minutes on low.
Pumpkin Cinnamon Buns~ The Dreams Weaver
Scrape mixture into a large oiled bowl and cover with plastic wrap or a damp dish towel. Set aside for 1 hour, it should just about double.

While the dough is rising, line the bottom of two 9-inch round cake pans with parchment paper and spray the sides of the pan and the paper with nonstick spray.

Pumpkin Cinnamon Buns~ The Dreams Weaver
Once the dough has doubled in size, transfer the dough onto a very well floured surface and flour the top of it well. With a rolling pin, roll the dough into a 16×12" rectangle. Brush the remaining melted butter over the dough. Stir together the filling ingredients (sugars, cinnamon, and salt) and sprinkle mixture evenly over dough. Starting on a longer side, roll the dough into a tight spiral.
Pumpkin Cinnamon Buns~ The Dreams Weaver
With a sharp serrated knife, using zero pressure (only the weight of the blade) gently saw your log with a back and forth motion into approximately 1" sections. The dough will make approximately 16-18 buns.

Divide buns between two prepared pans. Cover each pan with plastic wrap and let them rise for another hour.

Pumpkin Cinnamon Buns~ The Dreams Weaver
If you are prepping your buns ahead of time, you can put them in the fridge overnight. In the morning, leave them out for an hour to warm up and finish rising.

Preheat the oven to 350°F. Bake the buns for 20-25 minutes. The cinnamon buns will puff up and get golden brown and leave the whole house smelling absolutely amazing!

Pumpkin Cinnamon Buns~ The Dreams Weaver
To make the glaze, beat your cream cheese until it is light and fluffy, add powdered sugar, and vanilla. Pour in the milk little by little until you get the consistency of a thick icing.

Once the buns have cooled, you can add the glaze to the tops of them. The buns are good enough on their own that the glaze is totally optional!


Enjoy!

  photo signature_zpsf75b5071.png

Friday, October 3, 2014

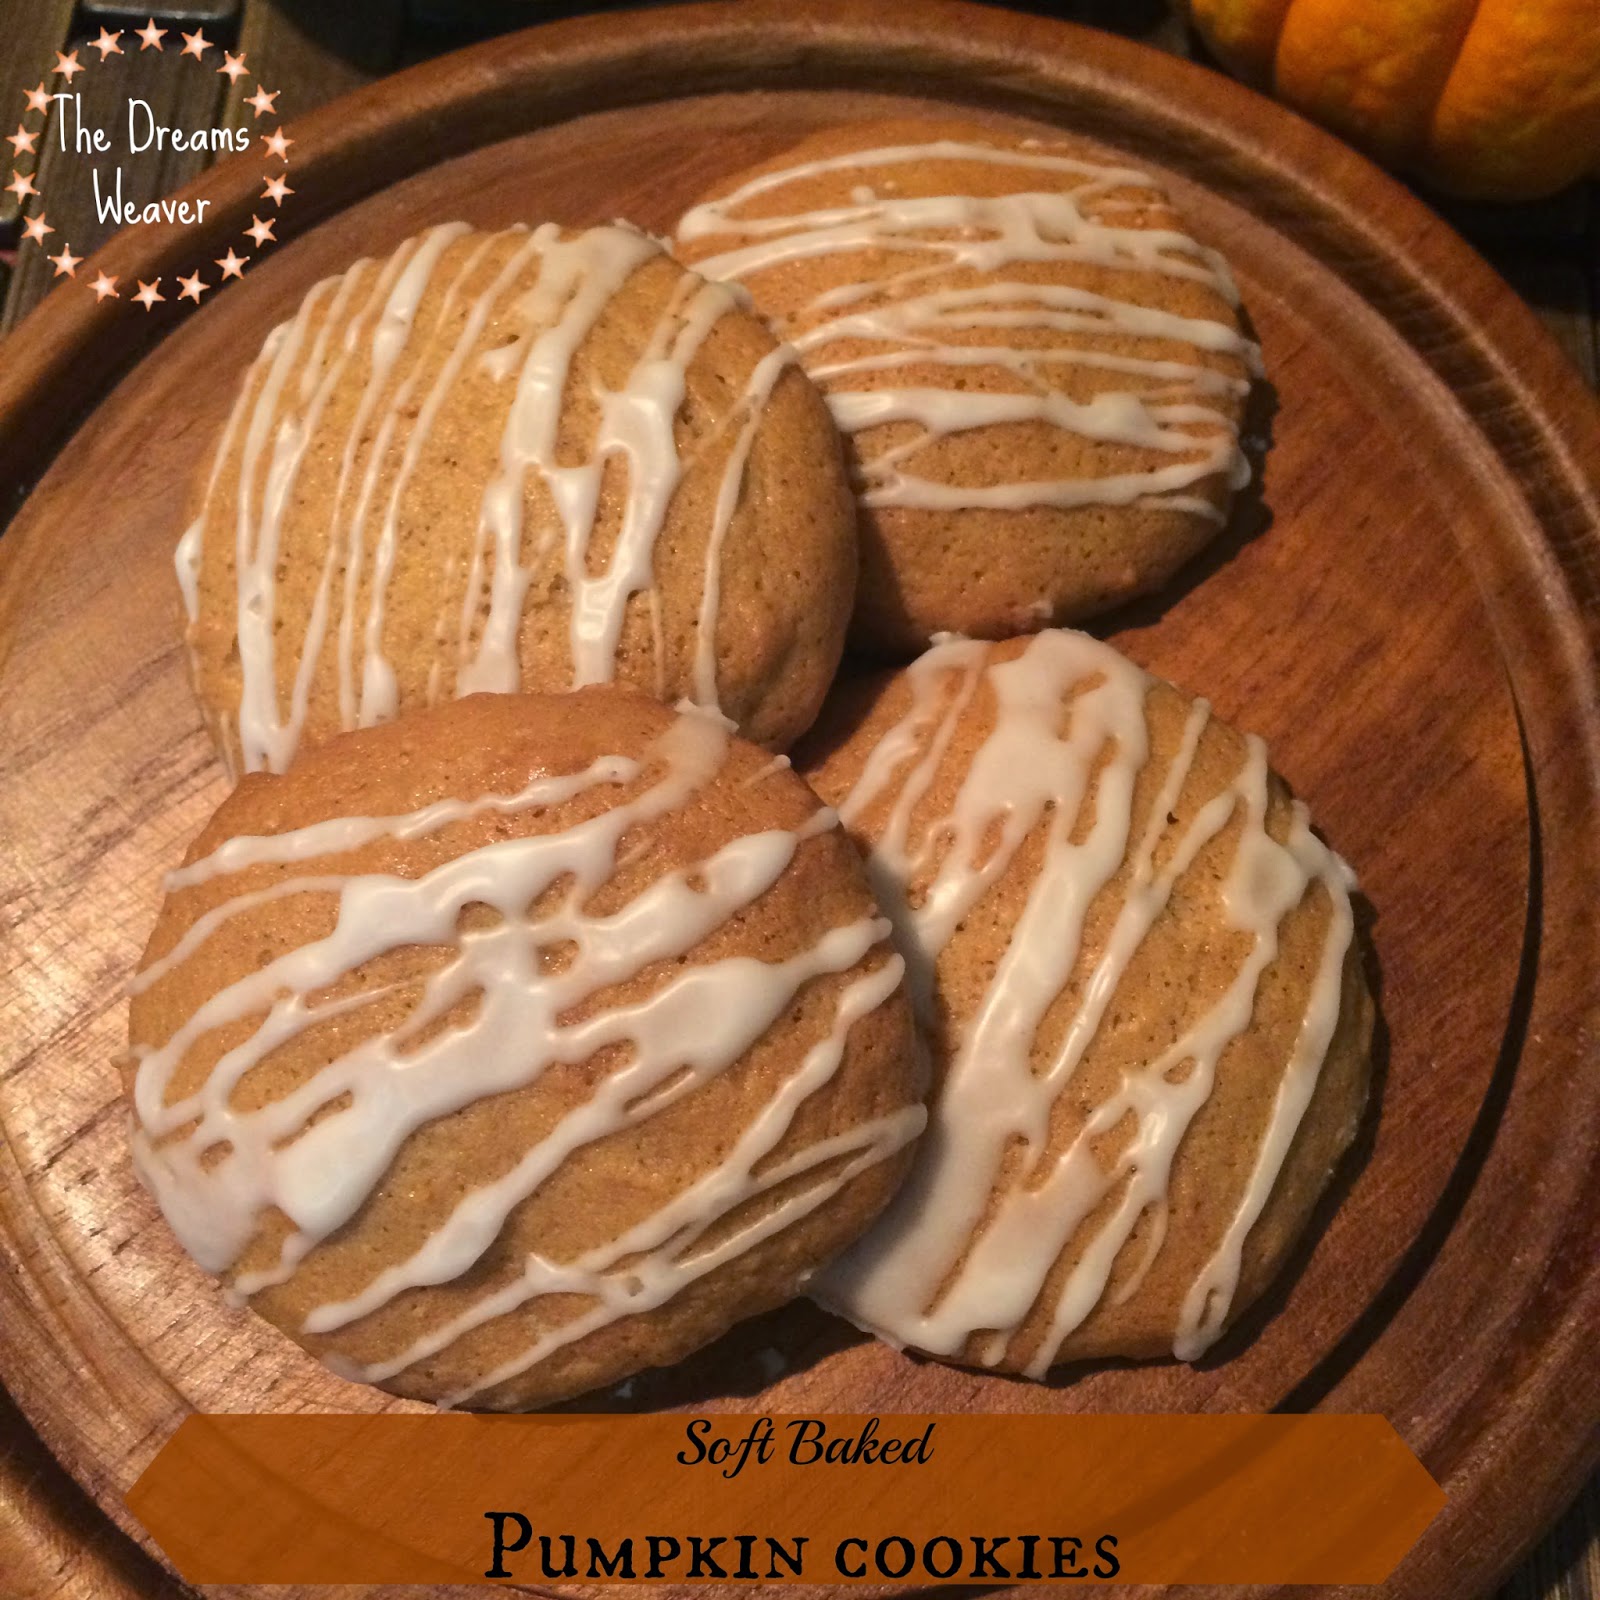
Soft Baked Pumpkin Cookies

My first post when I started my blog almost a year ago was my Roasted Pumpkin Puree. That was the first year we had gone pumpkin picking and the first time I ever tackled a whole pumpkin! Well, my love for pumpkin has grown since then! 

This year I wanted to try a new recipe from the pumpkins we've picked. These soft baked pumpkin cookies melt in your mouth with their great pumpkin flavor and warm spices topped with a sweet vanilla glaze.
Soft Baked Pumpkin Cookies~ The Dreams Weaver
What you will need:
1 1/2 cups granulated sugar 
1/2 cup butter (1 stick)
1 cup pumpkin puree
1 large egg 
1 teaspoon vanilla extract
1 tsp. baking soda 
1 tsp. baking powder 
1 tsp. ground cinnamon 
1/2 tsp. ground nutmeg 
1/2 tsp. salt  
2 1/2 cups all-purpose flour

Glaze (recipe follows) 
Soft Baked Pumpkin Cookies~ The Dreams Weaver
Preheat oven to 350° F. Line baking sheets with parchment paper.  

Beat sugar and butter together in you mixer until well blended. Beat in pumpkin, egg and vanilla extract until smooth. Gradually add in flour, baking soda, baking powder, cinnamon, nutmeg and salt while the mixture is on low speed. Drop by rounded tablespoon onto prepared baking sheets. 
Soft Baked Pumpkin Cookies~ The Dreams Weaver
Bake for 15 to 18 minutes or until edges are firm. Cool on baking sheets for 2 minutes; remove to wire racks to cool completely.

Soft Baked Pumpkin Cookies~ The Dreams Weaver

For glaze: 
Combine 1 cup sifted powdered sugar, 3 tablespoons milk, and 1 teaspoon vanilla extract in small bowl until smooth. Drizzle over cooled cookies and allow glaze to set up before putting them away.
Soft Baked Pumpkin Cookies~ The Dreams Weaver
Enjoy!

  photo signature_zpsf75b5071.png

Monday, November 25, 2013

Pumpkin Biscotti

It’s almost Thanksgiving, and this weekend I did a bit more pumpkin baking.  I baked pumpkin bread to bring to the Thanksgiving meal, chocolate scones for snacks for the week {I will share my recipe adaptation to my pumpkin scones hopefully later this week} and my new obsession, pumpkin biscotti.

It’s still fall here, but it is undeniable that winter is approaching.  As I was baking, grey clouds crept across the sky, and the chilly wind was howling outside my window scaring the leaves right off the trees.  This is the kind of weather where you just want to stay in, snuggled under a warm blanket with hot cocoa and some freshly baked biscotti. What else?
Pumpkin Biscotti~ The Dreams Weaver
My biscotti are packed with flavor and hints of warm spices, and great for dipping!  

While in the oven, they made the house feel so warming and rustic.

My recipe is very adaptable, swap out the pumpkin puree for chocolate chips, nuts, dried fruit, or any other flavor you are craving.
Baking Tip: When swapping out the pumpkin puree, use less flour as it will be drying without the moist pumpkin puree.  When making my chocolate chip biscotti, I used 2 cups of flour instead of 2 ½ cups.

What you will need:
2 1/2 cups of flour
1 cup of sugar
1 tsp. baking powder
1 tsp. cinnamon
1/2 tsp. nutmeg
Pinch of salt
1 tsp. vanilla extract
2 eggs
1/2 cup of pumpkin purée
Pumpkin Biscotti~ The Dreams Weaver
Preheat oven to 350°F.

In a large bowl add flour, salt, sugar, baking powder, and spices.
Pumpkin Biscotti~ The Dreams Weaver
In a medium bowl, whisk together eggs, pumpkin purée, and vanilla extract.
Pumpkin Biscotti~ The Dreams Weaver
Pour the pumpkin mixture into the flour mixture.  Give it a quick stir to incorporate all of the ingredients, the dough will be a little crumbly.
Pumpkin Biscotti~ The Dreams Weaver
Line a baking sheet with parchment paper.  Form the dough into a long log, roughly 16 inches long by 6 inches wide.  The log should be relatively flat, only about ½ inch high, otherwise you will have really big sliced of biscotti. 
Pumpkin Biscotti~ The Dreams Weaver
Baked for 20-25 minutes at 350°F, until the center is firm to the touch.
You can also make two smaller logs for mini bite-size biscotti, just cut the baking time down to 15-20 minutes.

Let biscotti cool for 15 minutes.  Use a serrated knife cut the log into 1 inch wide pieces. 
Pumpkin Biscotti~ The Dreams Weaver
Turn the oven to 300°F and bake for an additional 15-20 minutes. Allow to cool completely.
Pumpkin Biscotti~ The Dreams Weaver
Biscotti may be still be a little moist and chewy, so if you prefer it crisp let it sit uncovered overnight in a dry space.

Enjoy!
Pumpkin Biscotti~ The Dreams Weaver

 photo signature_zpsf75b5071.png

Monday, November 18, 2013

Guilt Free Apple Crisps

The weekends are my typical DIY/bake/try.something.new days {and where we try to clean up the house!}  So this weekend I was going through the fridge to see what looks like it needed to be eaten/cooked ASAP or what needed to be thrown out like yesterday! I stumbled upon two lonely apples in the back of the fridge {like the kids who get picked last in dodge ball in school} that we had forgotten about from apple picking a few weeks back. 

These two apples still looked fresh and delicious, ready to eat. I decided to do something different with them. I absolutely love apple chips, but they are usually the cost of a pound of apples for a small 1 ounce bag, so I attempted to make my own. I mean, how hard could it be? They were actually quite easy to make, and make a great healthy snack alternative while satisfying my sweet tooth without the guilt! 
Guilt Free Apple Crisps~ The Dreams Weaver

What you will need: 
1 tablespoon granulated sugar or vanilla sugar 
1 teaspoon ground cinnamon 
2 apples 
Guilt Free Apple Crisps~ The Dreams Weaver

 Heat oven to 250 degrees. Line baking sheets with parchment paper. 
Guilt Free Apple Crisps~ The Dreams Weaver

 In a small bowl, combine sugar and cinnamon. Wash apples. Using a mandoline or sharp knife, slice apples and pears about 1/8 inch thick. Arrange slices in a single layer on baking sheets. Sprinkle the spiced sugar evenly over apple slices. 
Guilt Free Apple Crisps~ The Dreams Weaver

 Bake for 1 hour, then flip over and sprinkle more spiced sugar on other side. Continue to bake until slices appear dry, around another 30 to 40 minutes. Turn the oven off and leave apple crisps in for another hour. This step will dry the slices even more and help them get crunchy. 
Guilt Free Apple Crisps~ The Dreams Weaver
 At this point the whole house smelled absolutely A-M-A-Z-I-N-G! The aroma of the baked apples and strong cinnamon flavor with the sweetness of the sugar, really made it feel like Fall in the house! 

 Store apple crisps at room temperature in an airtight container. I chose a mason jar, since those really seal well, and you can see the beautiful color and texture of the crisps.
Guilt Free Apple Crisps~ The Dreams Weaver
Enjoy!


 photo signature_zpsf75b5071.png

Thursday, November 14, 2013

Dreamy Pumpkin Bread

Have I said lately how much I love pumpkin? In case you missed it…I LOVE PUMPKIN! I don’t think I will ever get sick of it.

With that said, I want to share my pumpkin bread recipe. It started out as my banana bread recipe when I first made it a few years ago. This weekend a light bulb went off in my head as I was trying to think of new ways to incorporate pumpkin in my life….I can substitute mashed bananas for my pumpkin puree! I absolutely love Starbucks pumpkin bread, but at $2.25 a slice and some 300+ calories later I always regret it. My version has less than half the calories per slice and I can eat it more often {more pumpkin=more happy.} 

Dreamy Pumpkin Bread~ The Dreams Weaver

What you will need:
1 ½ cups flour
1 ¼ tsps. baking powder
½ tsp. baking soda
½ tsp. ground cinnamon
1/8 tsp. salt
2 slightly beaten egg whites

1 cup pumpkin puree
¾ cup sugar
¼ cup canola oil
Nonstick spray
8x4x2” Loaf pan

Dreamy Pumpkin Bread~ The Dreams Weaver
 
In a medium mixing bowl stir together flour, baking powder, baking soda, cinnamon, and salt.

Dreamy Pumpkin Bread~ The Dreams Weaver

In a large mixing bowl whisk together egg whites, pumpkin, sugar, and oil. 

Dreamy Pumpkin Bread~ The Dreams Weaver

Stir flour mixture into pumpkin mixture until well incorporated.

Dreamy Pumpkin Bread~ The Dreams Weaver

Liberally spray a loaf pan with nonstick spray {you do not want your bread to stick to the pan, so really spray it!} Spread batter into pan and bake at 350 degrees for 45-50 minutes, or until a toothpick inserted into the center comes out clean.

Dreamy Pumpkin Bread~ The Dreams Weaver

Dreamy Pumpkin Bread~ The Dreams Weaver

Let the bread cool in the loaf pan for 10 minutes to set up. It was so hard not to take it out and have a taste of it at this point!

Dreamy Pumpkin Bread~ The Dreams Weaver

Remove from the pan and let cool thoroughly. Wrap in plastic wrap for storing.

Dreamy Pumpkin Bread~ The Dreams Weaver

Enjoy!


 photo signature_zpsf75b5071.png