Showing posts with label instadessert. Show all posts

Wednesday, November 3, 2021

Creme Brûlée

My husband’s favorite dessert (and one of mine) is creme brûlée. We had a really good creme brûlée a few weeks ago while away in Antigua, and I wanted to recreate it. While I had always been intimidated to try to make it, I took the plunge the other week! And it passed his taste test! Success!
Creme Brûlée ~ The Dreams Weaver
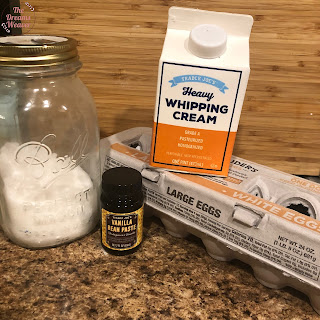
What you will need
1 pint heavy cream 
1 tbsp vanilla bean paste 
3 large egg yolks 
¼ cup granulated sugar 
⅛ cup turbinado sugar
Creme Brûlée ~ The Dreams Weaver
Directions
Preheat the oven to 325°F.

In a saucepan, add the heavy cream and vanilla bean paste. Bring to a light simmer for 5 minutes. Take off the heat and cool to room temperature for 30 minutes.

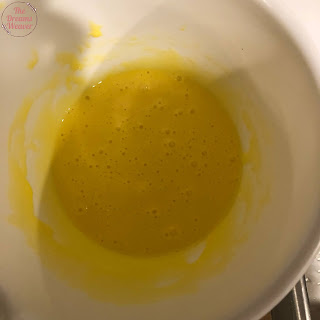
In a bowl, whisk together the egg yolks and granulated sugar until combined and lighter in color. 
Creme Brûlée ~ The Dreams Weaver
Slowly add the cooled cream mixture, whisking constantly. 
Creme Brûlée ~ The Dreams Weaver
Place 6 glass jars or ramekins in a large pan. Pour the mixture into the jars. Place the pan in the oven, then pour hot water into the bottom of the pan, enough so the water comes about halfway up the sides of the jars. 
Creme Brûlée ~ The Dreams Weaver
Bake until set and just a little bit jiggly, 35 to 40 minutes. Remove the jars from the oven and let cool on the counter until they reach room temperature, then place the jars in the fridge for 2 hours to chill.

Evenly sprinkle the top of each jar with the turbinado sugar. Using a kitchen torch, or under the broiler, melt the sugar until it bubbles and turns dark golden brown. This will form a crunchy top. Let sit for a few minutes.
Creme Brûlée ~ The Dreams Weaver
Enjoy!
photo signature_zpsf75b5071.png

Sunday, September 5, 2021

Honey Apple Biscotti

It’s almost Rosh Hashanah and apple picking season, so what better way to bring in the new year and celebrate with an abundance of apples from apple picking than with some biscotti. These biscotti are sweetened with honey and have traditional warm apple spices in them. Then, they are topped with some dried apples. Alternatively, you can cube fresh apples and add to the middle of the biscotti.
Honey Apple Biscotti ~ The Dreams Weaver
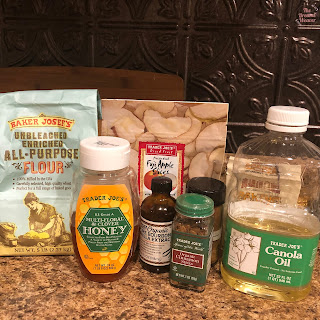
What you will need:
½ cups of flour
3/4 cup honey
1 tsp. baking soda
1 tsp. cinnamon
½ tsp. nutmeg
½ tsp. cardamom
½ tsp. ginger
1/4 tsp. allspice
Pinch of salt
½ tsp. vanilla extract
3/4 cup canola oil
2 eggs
1.5 oz dried apples (I use Trader Joe’s freeze dried Fuji apple slices)
Honey Apple Biscotti ~ The Dreams Weaver
Directions

Preheat oven to 350°F. 

In a large bowl add flour, salt, baking soda, and spices.

In a medium bowl, whisk together eggs, oil, honey, and vanilla extract. 

Pour the wet mixture into the flour mixture. Give it a quick stir to incorporate all of the ingredients, the dough will be a little crumbly.
Line a baking sheet with parchment paper.  Form the dough into 2 long logs.  The logs should be relatively flat, only about ½ inch high, otherwise you will have really big slices of biscotti.  
Honey Apple Biscotti ~ The Dreams Weaver
Crush your dried apple chips and sprinkle over the top. 

Bake for 20-25 minutes at 350°F, until the center is firm to the touch.
Honey Apple Biscotti ~ The Dreams Weaver
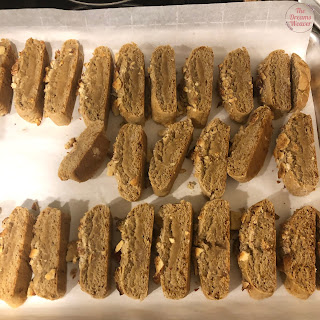
Let biscotti cool for 15 minutes.  Use a serrated knife cut the log into 1 inch wide pieces.
Honey Apple Biscotti ~ The Dreams Weaver
Turn the oven to 300°F and bake for an additional 15-20 minutes. Allow to cool completely.

Biscotti may be still be a little moist and chewy, so if you prefer it crisp let it sit uncovered overnight in a dry space. 

Enjoy!


photo signature_zpsf75b5071.png

Friday, August 20, 2021

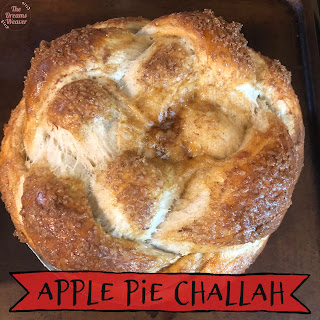
Apple Pie Challah

This challah is the perfect challah for Rosh Hashana! The challah dough is made with honey instead of sugar, with an added sprinkle of cinnamon. It is stuffed with a homemade Granny Smith apple pie filling that is both sweet and tart.
Apple Pie Challah ~ The Dreams Weaver
What you will need:
Challah dough {recipe here
swap honey for sugar and add 2 tbsp cinnamon
Filling
3 Granny Smith apples
2 tsp cinnamon 
1 tbsp lemon juice
½ tsp salt 
¼ cup brown sugar
Topping
½ cup brown sugar
1 tbsp cinnamon
1 egg
Apple Pie Challah ~ The Dreams Weaver
Directions
Prepare challah dough according to directions. Remember to swap honey and add cinnamon!
Tip: when measuring out the honey, spray your measuring cup first and the honey glides right out!
Apple Pie Challah ~ The Dreams Weaver
Let to rise in the fridge overnight, or on the counter with the punch down method. 

While the challah is rising, prepare the apple pie filling:
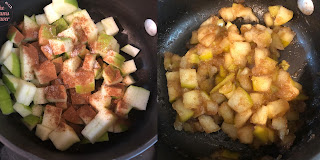
Core and cut the apples onto small dices, this way it fits well inside the strands and braids easier. 
Combine the apples, cinnamon, brown sugar, salt, and lemon juice in a small pot and simmer for about 10 minutes until the apple become softer and the liquid thickens. 
Allow the filling to cool before using in the challah.
Apple Pie Challah ~ The Dreams Weaver
Preheat the oven to 350°F. 

Divide dough into 4 equal parts and then roll each part into a log.

Gently flatten each log so that it is about 2 inches wide. Spoon about 1 tbsp apple filling down the center of each log. Pinch the edges to seal, and then braid the logs either as a round challah or a regular challah.
Apple Pie Challah ~ The Dreams Weaver
Below I will walk you through the steps for braiding a round challah:
A. Place two strands in the center of your board, running parallel top to bottom. Place the third strand across the two strands, going under the left strand and over the right. Place the fourth strand directly below the third strand, going over the left strand and under the right. You will have something similar to a tic-tac-toe board pattern, with the center of the board being a very small square and the logs sticking out from that center. Keep the center as tight as possible {you’ll be braiding from the center.} I have numbered the strand ends in the following diagram to make the braiding process easier.
B. Take strand 1 and cross it over strand 2. 
Take strand 3 and cross it over strand 4. 
Take strand 5 and cross it over strand 6. 
Take strand 7 and cross it over strand 8. 
C. Take strand 2 and cross it back over the opposite way, over strand 7.
Take strand 8 and cross it over strand 5.
Take strand 6 and cross it over strand 3.
Take strand 4 and cross it over strand 1.
D. Take strand 7 and twist it with strand 4.
Take strand 6 and twist it with strand 1.
Take strand 8 and twist it with strand 3.
Take strand 5 and twist it with strand 2.
E. Tuck all of the twisted ends under the challah. Place on a baking sheet or in a round pan to rise. 
Apple Pie Challah ~ The Dreams Weaver
Place the challah in a greased pan and let the challah rise covered with a towel 30 minutes. 
Apple Pie Challah ~ The Dreams Weaver
Once the challah has risen, brush the top with an egg wash and then the brown sugar cinnamon mixture. 
Apple Pie Challah ~ The Dreams Weaver
Bake for 30-35 minutes, until the top is golden brown and the challah is cooked through.
Apple Pie Challah ~ The Dreams Weaver
Enjoy!
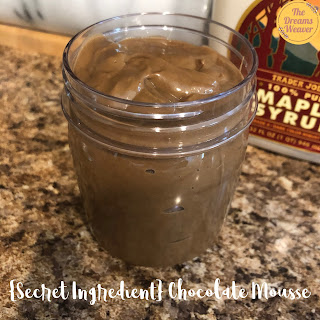

photo signature_zpsf75b5071.png

Wednesday, May 12, 2021

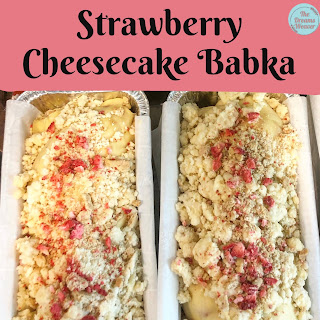
Strawberry Cheesecake Babka

With Shavuot right around the corner, I wanted to make a dairy dessert that was cheesecake inspired! This strawberry cheesecake babka is perfect for Shavuot!
Strawberry Cheesecake Babka ~ The Dreams Weaver
What you will need:
Babka dough {recipe here}

Vanilla Powder Filling
2 cups powdered sugar
1 cup granulated sugar
1 box vanilla pudding mix

Cheese Filling
8 oz of whipped cream cheese
½ cup granulated sugar
1 tbsp vanilla
1 egg yolk

Add ins
Freeze dried strawberries
Graham cracker pieces

Crumb Topping
1 cup flour
1 cup powdered sugar
6 tbsp canola oil 
Strawberry Cheesecake Babka ~ The Dreams Weaver
Directions
Prepare babka dough according to instructions here, recipe makes 3 babkas.

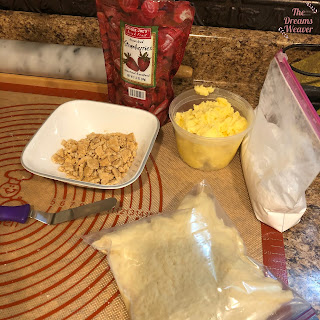
Prepare the babka crumbs: Mix crumb ingredients together until crumbs form. The consistency should be similar to wet sand. Add in some of the graham cracker pieces and crushed up freeze dried strawberries. 

Prepare the cheese filling: whip all ingredients together in a bowl of a stand mixer and chill until ready to use. 

Preheat oven to 350°F. Coat 3 (2 lb) loaf pans with nonstick cooking spray. Line each with parchment paper. 

Divide dough into 3 portions. Roll 1 portion into a 13x10x¼” rectangle. Spread on a layer of the cheese filling, the dust an even layer of the vanilla powder filling and top with graham cracker pieces and pulverized freeze dried strawberries. 
Strawberry Cheesecake Babka ~ The Dreams Weaver
Roll dough over filling to form a log. Twist log; fold in half. Place into prepared pan. Cut a shallow slit across the length of the log. Repeat with remaining portions. Top loaves with babka crumbs and toppings.  
Strawberry Cheesecake Babka ~ The Dreams Weaver
Place loaf pans onto a baking sheet. Bake for 30 minutes; rotate pans. Bake additional 15 minutes; babka crumb topping should be golden brown.

Cool on cooling racks. Do not cut into babka until it has cooled, as dough continues to bake even after being removed from oven.

Look at all of those cheesecakey layers!
Strawberry Cheesecake Babka ~ The Dreams Weaver
Enjoy!

photo signature_zpsf75b5071.png

Monday, April 26, 2021

Coconut Custard

This dairy free coconut custard is a creamy, dreamy dessert that transports me to a tropical beach on a faraway island! It’s full of sweet coconut flavor and this custard can be eaten by itself or be used in place of regular pastry cream. I will be using it later this week as a filling inside of one of my stuffed challahs. 
Coconut Custard ~ The Dreams Weaver
What you will need
1 13.5 oz can full-fat coconut cream
5 egg yolks
⅓ cup granulated sugar
¼ cup cornstarch
1 tbsp vanilla extract
Optional: toasted coconut for topping

Directions
Add the coconut cream to a saucepan and heat over medium-low heat.
Coconut Custard ~ The Dreams Weaver
While the milk is heating, add the egg yolks, sugar, and cornstarch to a glass bowl. Whisk together to combine (mixture will be a little clumpy) and set aside.
Coconut Custard ~ The Dreams Weaver
Whisk the milk occasionally until it starts to steam, but do not boil. Remove the milk from the heat and while whisking, pour a little milk (about ½ cup) into the egg mixture, do not stop whisking.
Continue to simultaneously whisk and slowly pour the remaining milk into the egg mixture. 
Coconut Custard ~ The Dreams Weaver
When all the milk has been poured into the bowl, give the mixture a good stir and then pour it back into the saucepan. 
Coconut Custard ~ The Dreams Weaver
Heat the milk mixture over medium heat, whisking almost constantly, until it starts to get thick like pudding and bubble. Remove from the heat and whisk in the vanilla extract. 

Place a strainer over a clean bowl and pour the custard into the strainer. Stir and push the custard through the strainer, leaving any clumps behind.

Place a piece of plastic wrap directly on top of the custard and cool to room temperature. When cool, refrigerate at least 2 hours before serving.
Note- When placing the plastic wrap on the custard, make sure it is actually touching the custard (like you're putting a band-aid on it). That will prevent a thick skin layer from forming on top of the custard.

Enjoy!

photo signature_zpsf75b5071.png

Thursday, April 22, 2021

{Secret Ingredient} Chocolate Mousse

I love my sweets, dessert, and anything chocolate! This recipe is all of that, but none of the guilt. It is vegan, and the banana and avocado help imitate the creamy consistency you would get in a traditional mousse.  
{Secret Ingredient} Chocolate Mousse ~ The Dreams Weaver
What you will need:
1 ripe banana sliced
1 ripe avocado diced
2 tbsp cocoa powder
1 tbsp pure maple syrup
{Secret Ingredient} Chocolate Mousse ~ The Dreams Weaver
Directions:
Place all ingredients in a blender or food processor and blend until smooth and creamy, about 1-2 minutes. 
{Secret Ingredient} Chocolate Mousse ~ The Dreams Weaver
Divide among 2 glass jars and refrigerate until set, about 1 hour. 

Enjoy!

photo signature_zpsf75b5071.png