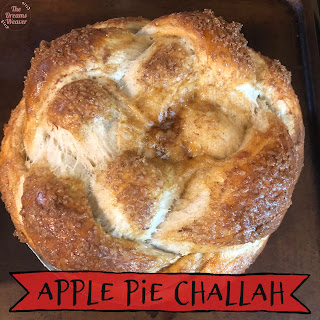
This challah is the perfect challah for Rosh Hashana! The challah dough is made with honey instead of sugar, with an added sprinkle of cinnamon. It is stuffed with a homemade Granny Smith apple pie filling that is both sweet and tart.
Challah dough {recipe here}
swap honey for sugar and add 2 tbsp cinnamon
Filling
3 Granny Smith apples
2 tsp cinnamon
1 tbsp lemon juice
½ tsp salt
¼ cup brown sugar
Topping
½ cup brown sugar
1 tbsp cinnamon
1 egg
Directions:
Prepare challah dough according to directions. Remember to swap honey and add cinnamon!
Tip: when measuring out the honey, spray your measuring cup first and the honey glides right out!
Let to rise in the fridge overnight, or on the counter with the punch down method.
While the challah is rising, prepare the apple pie filling:
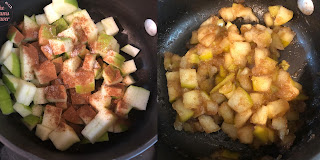
Core and cut the apples onto small dices, this way it fits well inside the strands and braids easier.
Combine the apples, cinnamon, brown sugar, salt, and lemon juice in a small pot and simmer for about 10 minutes until the apple become softer and the liquid thickens.
Allow the filling to cool before using in the challah.
Preheat the oven to 350°F.
Divide dough into 4 equal parts and then roll each part into a log.
Gently flatten each log so that it is about 2 inches wide. Spoon about 1 tbsp apple filling down the center of each log. Pinch the edges to seal, and then braid the logs either as a round challah or a regular challah.

Below I will walk you through the steps for braiding a round challah:

Below I will walk you through the steps for braiding a round challah:
A. Place two strands in the center of your board, running parallel top to bottom. Place the third strand across the two strands, going under the left strand and over the right. Place the fourth strand directly below the third strand, going over the left strand and under the right. You will have something similar to a tic-tac-toe board pattern, with the center of the board being a very small square and the logs sticking out from that center. Keep the center as tight as possible {you’ll be braiding from the center.} I have numbered the strand ends in the following diagram to make the braiding process easier.
B. Take strand 1 and cross it over strand 2.
Take strand 3 and cross it over strand 4.
Take strand 5 and cross it over strand 6.
Take strand 7 and cross it over strand 8.
C. Take strand 2 and cross it back over the opposite way, over strand 7.
Take strand 8 and cross it over strand 5.
Take strand 6 and cross it over strand 3.
Take strand 4 and cross it over strand 1.
D. Take strand 7 and twist it with strand 4.
Take strand 6 and twist it with strand 1.
Take strand 8 and twist it with strand 3.
Take strand 5 and twist it with strand 2.
E. Tuck all of the twisted ends under the challah. Place on a baking sheet or in a round pan to rise.
Place the challah in a greased pan and let the challah rise covered with a towel 30 minutes.
Once the challah has risen, brush the top with an egg wash and then the brown sugar cinnamon mixture.


