I’ve suffered through one too many batches of burned or soggy kale chips. It took me a while to master my baked kale chip recipe, but I’ve learned some valuable lessons along the way and I’d like to pass my tips along to you!
You want a balance between crispiness and chewiness, without tasting burned. When baked properly, they really do make the perfect base for a satisfying chip alternative. They are also a super food and have many health benefits.
With these few easy techniques you’ll be well on your way to kale chip heaven. No dehydrator required!
What you will need:
Kale
Olive oil
Sea salt or other seasonings (optional)
1. Remove the stems and tear leaves into large pieces. Remove the stems very quickly by grabbing the base of the stem with one hand and pushing outwards along the stem to slide off the leaves.
2. Wash and thoroughly dry the leaves before beginning.
If the leaves aren’t properly dried, the water can “steam” the kale chips while baking and lead to the dreaded soggy kale chip. Be sure they are nice and dry before you add in the oil.
3. Don’t skimp the oil, but don’t drench it in oil either
A little bit of extra virgin olive oil goes a long way. I like to use ½ TBSP. of oil per baking sheet of kale chips. Rub the oil into the leaves to ensure all of the leaves are coated. Oil also helps the spices stick to the leaves.
4. Spread kale into a single layer on a parchment lined baking sheet. Be sure to rotate the baking sheet halfway through baking.
5. It’s all about the low-heat for even baking. It takes a bit longer to bake, but I can assure you it’s worth it because you don’t get any burnt pieces. The goal is to crisp the kale, not scorch it into little black burnt pieces! In my oven, I bake at 300 for 10 minutes, then I rotate the pan, and bake for another 15 minutes.
6. Cool for just a few minutes on the baking sheet. This allows the kale chips to crisp up even more once they are out of the oven.
Enjoy!
Showing posts with label healthy snack. Show all posts
Showing posts with label healthy snack. Show all posts
Tuesday, January 27, 2015
Monday, March 31, 2014
Post Juice Cleanse Healthy Muffins
As part of my New Year's Resolution I promised myself that I would exercise more and eat healthier this year. Normally, my motivation for my resolution gets thrown out the window a few weeks after January 1st rolls around. But, this year it's almost Summer and I'm still sticking to my plan!
I started my resolution by doing a 3 day juice fast from Healthy Blender Girl {the winter juice} and plan to do it every season {every 3 months.} I know what you're thinking…that's impossible or that the results don't last. But let me tell you, it was definitely hard the first day. I was starving and wanted to quit only a few hours in! But, by day 2 I was feeling better and actually felt satisfied with my juices and midday herbal teas.
After successfully completing all 3 days of juicing, I weighed in. I had lost 4 pounds! While this may not seem a lot for some people, that was really all I wanted to lose.
The next 3 days I needed to restrict my intake to raw veggies and fruits. This part was easy because I had a ton of my juicing veggies and fruits left over. The next 3 days I was able to introduce other meat/dairy items back into my diet.
That is where this recipe comes in. The muffin base is an adaptation to my Pumpkin Bread recipe. Swap out the pumpkin puree with your leftover day 2 midday carrot/butternut squash pulp that you saved after straining it from your juice. This pulp still has a lot of the vitamins left in it, and great flavor!
*PS notice my new carrot logo on my photos? From now on I am going to add this to my healthy posts!
What you will need:
1 cup flour
1 ¼ tsps. baking powder
½ tsp. baking soda
½ tsp. ground cinnamon
1/8 tsp. salt
2 slightly beaten egg whites
½ cup leftover juice cleanse pulp½ cup sugar
¼ cup canola oil
Nonstick spray
2 muffin pans
In a medium mixing bowl stir together flour, baking powder, baking soda, cinnamon, and salt.
In a large mixing bowl whisk together egg whites, juice pulp, sugar, and oil.
Stir flour mixture into juice pulp mixture until well incorporated.
Liberally spray your muffin pans with nonstick spray.
Spread batter into pans and bake at 350° for 20-25 minutes, or until a toothpick inserted into the center comes out clean.
Another variation I tried for these muffins was my day 2 evening juice of broccoli/romaine/cilantro pulp.
Enjoy!
Any questions or comments about juicing just ask away!
I started my resolution by doing a 3 day juice fast from Healthy Blender Girl {the winter juice} and plan to do it every season {every 3 months.} I know what you're thinking…that's impossible or that the results don't last. But let me tell you, it was definitely hard the first day. I was starving and wanted to quit only a few hours in! But, by day 2 I was feeling better and actually felt satisfied with my juices and midday herbal teas.
After successfully completing all 3 days of juicing, I weighed in. I had lost 4 pounds! While this may not seem a lot for some people, that was really all I wanted to lose.
The next 3 days I needed to restrict my intake to raw veggies and fruits. This part was easy because I had a ton of my juicing veggies and fruits left over. The next 3 days I was able to introduce other meat/dairy items back into my diet.
That is where this recipe comes in. The muffin base is an adaptation to my Pumpkin Bread recipe. Swap out the pumpkin puree with your leftover day 2 midday carrot/butternut squash pulp that you saved after straining it from your juice. This pulp still has a lot of the vitamins left in it, and great flavor!
What you will need:
1 cup flour
1 ¼ tsps. baking powder
½ tsp. baking soda
½ tsp. ground cinnamon
1/8 tsp. salt
2 slightly beaten egg whites
½ cup leftover juice cleanse pulp½ cup sugar
¼ cup canola oil
Nonstick spray
2 muffin pans
In a medium mixing bowl stir together flour, baking powder, baking soda, cinnamon, and salt.
In a large mixing bowl whisk together egg whites, juice pulp, sugar, and oil.
Stir flour mixture into juice pulp mixture until well incorporated.
Liberally spray your muffin pans with nonstick spray.
Spread batter into pans and bake at 350° for 20-25 minutes, or until a toothpick inserted into the center comes out clean.
Another variation I tried for these muffins was my day 2 evening juice of broccoli/romaine/cilantro pulp.
Enjoy!
Any questions or comments about juicing just ask away!
Monday, November 18, 2013
Guilt Free Apple Crisps
The weekends are my typical DIY/bake/try.something.new days {and where we try to clean up the house!} So this weekend I was going through the fridge to see what looks like it needed to be eaten/cooked ASAP or what needed to be thrown out like yesterday! I stumbled upon two lonely apples in the back of the fridge {like the kids who get picked last in dodge ball in school} that we had forgotten about from apple picking a few weeks back.
These two apples still looked fresh and delicious, ready to eat. I decided to do something different with them. I absolutely love apple chips, but they are usually the cost of a pound of apples for a small 1 ounce bag, so I attempted to make my own. I mean, how hard could it be?
They were actually quite easy to make, and make a great healthy snack alternative while satisfying my sweet tooth without the guilt!
What you will need:
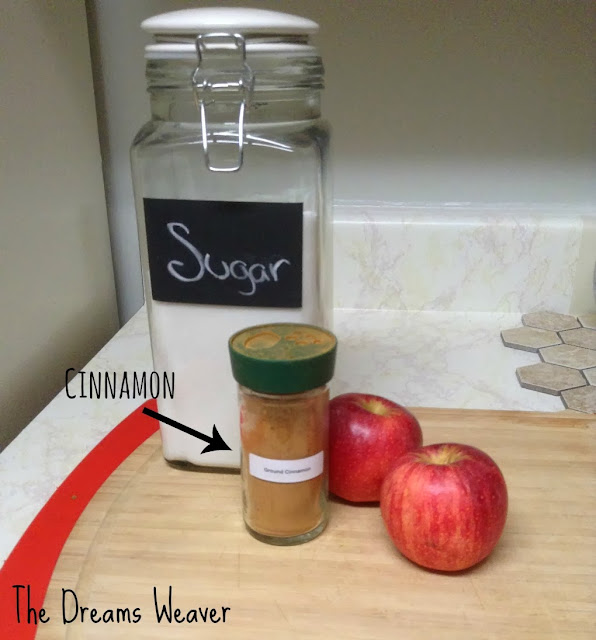
1 tablespoon granulated sugar or vanilla sugar
1 teaspoon ground cinnamon
2 apples
Heat oven to 250 degrees. Line baking sheets with parchment paper.
In a small bowl, combine sugar and cinnamon.
Wash apples. Using a mandoline or sharp knife, slice apples and pears about 1/8 inch thick. Arrange slices in a single layer on baking sheets. Sprinkle the spiced sugar evenly over apple slices.
Bake for 1 hour, then flip over and sprinkle more spiced sugar on other side. Continue to bake until slices appear dry, around another 30 to 40 minutes. Turn the oven off and leave apple crisps in for another hour. This step will dry the slices even more and help them get crunchy.
At this point the whole house smelled absolutely A-M-A-Z-I-N-G! The aroma of the baked apples and strong cinnamon flavor with the sweetness of the sugar, really made it feel like Fall in the house!
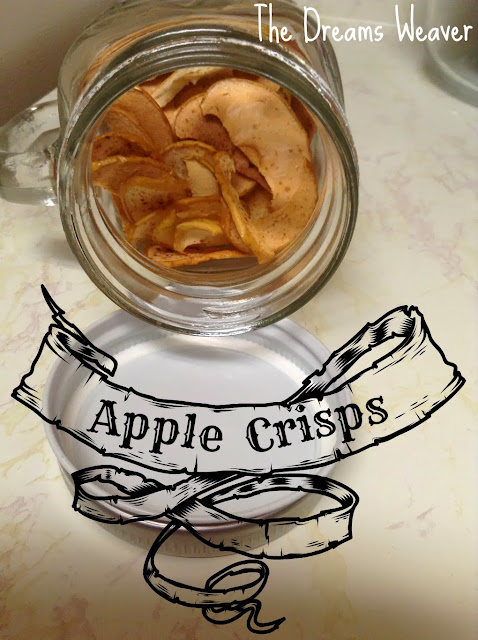
Store apple crisps at room temperature in an airtight container. I chose a mason jar, since those really seal well, and you can see the beautiful color and texture of the crisps.
Enjoy!

Subscribe to:
Posts (Atom)


