Showing posts with label delicious. Show all posts

Wednesday, May 28, 2014

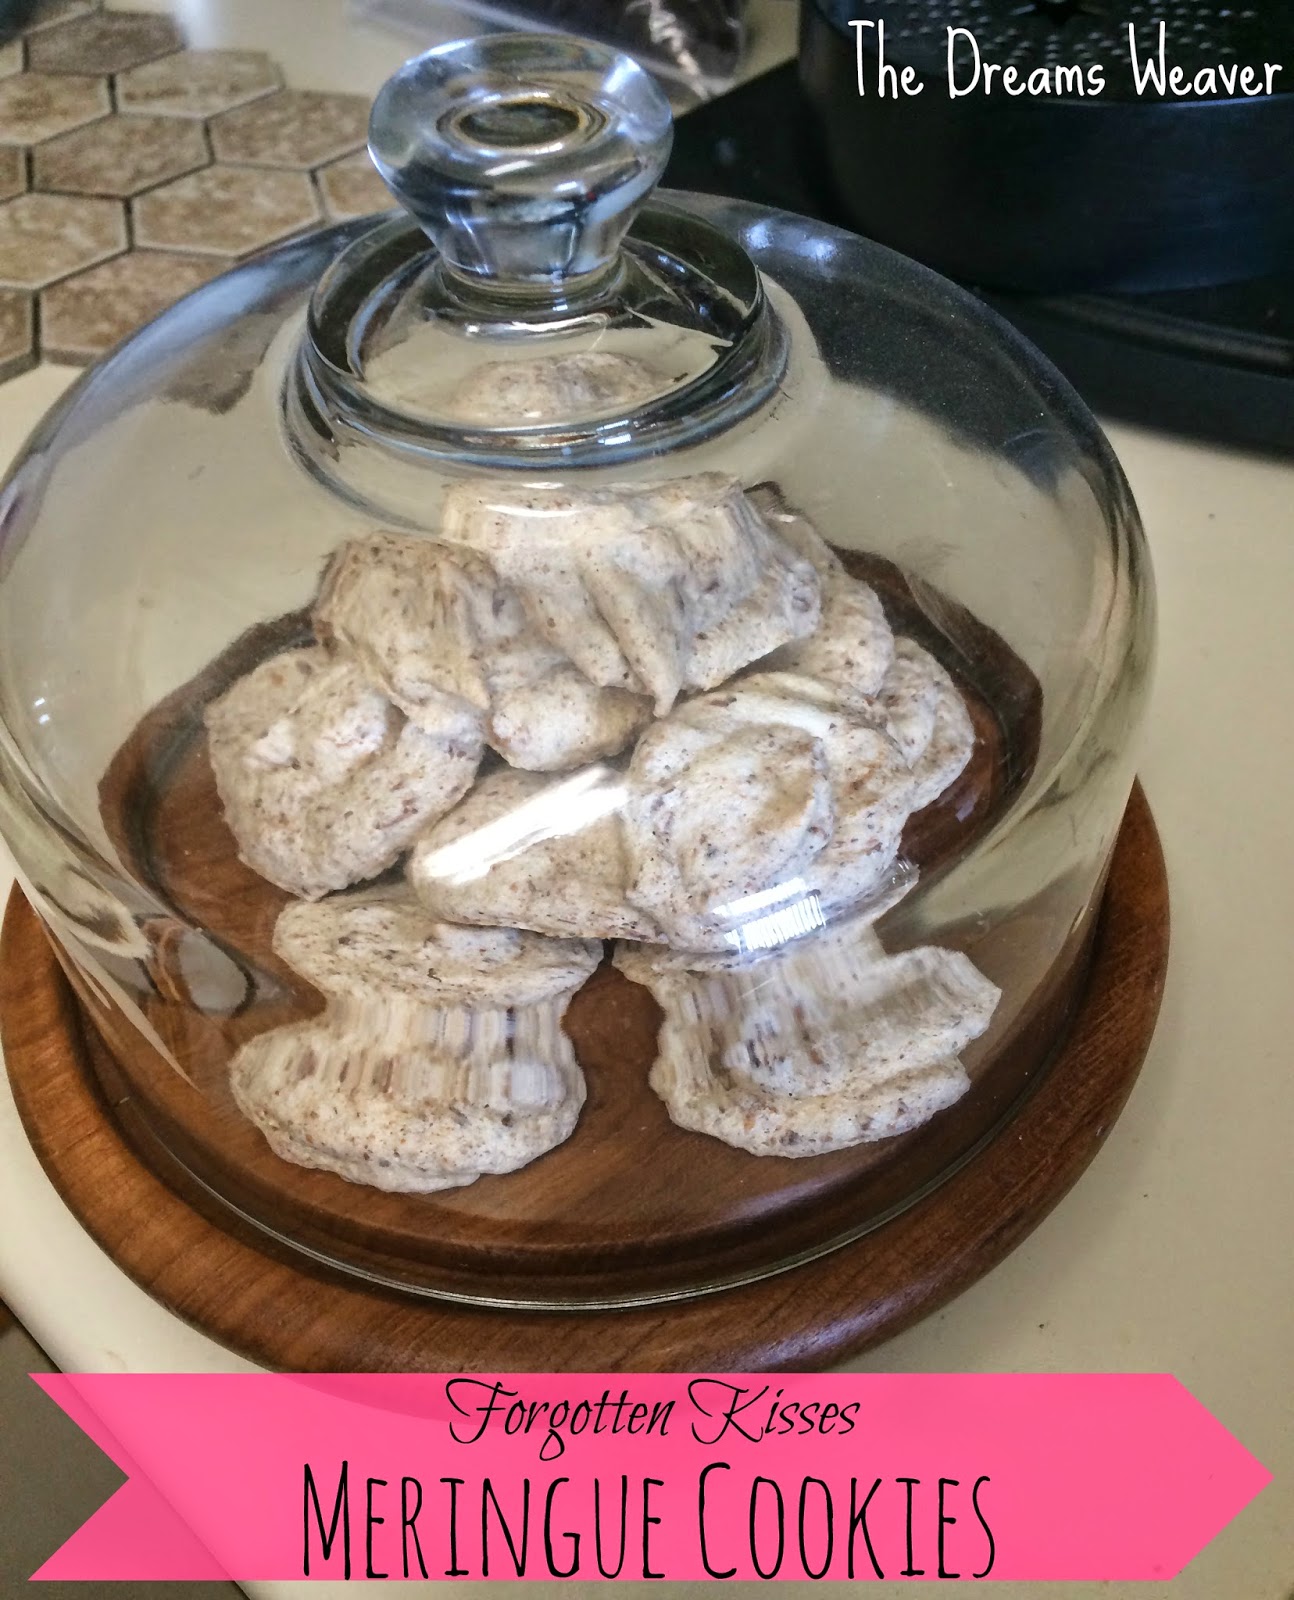
Forgotten Kisses Meringue Cookies

This past weekend I tried out something new with my stand mixer. Have I said lately how much I LOVE my KitchenAid mixer? I don’t know how I lived without it. It’s like having an extra set of hands, but better than the hubby’s who’d be eating any of my raw confections before they can make it to the oven. 

Meringues are light, airy, delicious and low fat! You can add all different nuts, chocolate, sprinkles, food coloring, extracts…the possibilities are endless! And it’s amazing how far so few ingredients can take you. 

Forgotten Kisses Meringue Cookies~ The Dreams Weaver

What you will need: 
2 egg whites at room temperature 
½ tsp. baking powder 
2/3 cup sugar 
1 tsp. vanilla extract 
1 cup toasted almonds or chocolate chips, optional 
½ tsp. cinnamon, optional 
Yields 2 dozen 
Forgotten Kisses Meringue Cookies~ The Dreams Weaver
Ignore the 4 eggs- I made two batches in the same day
Preheat the oven to 350°. 
In the bowl of an electric mixer {or hand mixer}, beat egg whites until foamy. {It should almost look like sudsy soapy water.} 
Forgotten Kisses Meringue Cookies~ The Dreams Weaver
Add the baking powder and beat until fluffy, but on at all dry. Be careful not to overbeat. Add the sugar in gradually, 3 tablespoons at a time. When about half of the sugar has been added, add the vanilla extract {and cinnamon if you're using}. 
Forgotten Kisses Meringue Cookies~ The Dreams Weaver
Continue beating and adding the remaining sugar in increments until all of the sugar is dissolved and the meringue is shiny and tight. 
Forgotten Kisses Meringue Cookies~ The Dreams Weaver
Gently fold in the chopped nuts or chocolate chips. 
Forgotten Kisses Meringue Cookies~ The Dreams Weaver
Working one teaspoon at a time, push a teaspoonful of meringue from the tip of 1 teaspoon with the back of another teaspoon onto parchment lined baking sheet, leaving an inch between the meringues. 
Forgotten Kisses Meringue Cookies~ The Dreams Weaver
Place the baking sheets in the preheated oven and turn the oven off. Leave the cookies undisturbed in the oven for at least two hours, or even overnight, until the meringues are crisp and dry. 
Forgotten Kisses Meringue Cookies~ The Dreams Weaver
Enjoy! 
Forgotten Kisses Meringue Cookies~ The Dreams Weaver

 photo signature_zpsf75b5071.png

Friday, May 16, 2014

Chocolate Filled Vanilla Cupcakes

The other week I finally decided to splurge on a KitchenAid stand mixer.  I had put one on my wedding registry, hoping someone would be ever so generous to spend the $350 on the 5 quart Ice KitchenAid stand mixer.  Well, that never happened!  So, while I did not get the exact one I wanted, I got the cobalt blue 4.5 quart stand mixer, a little cheaper and 1/2 quart smaller bowl.  A little smaller, which is actually a plus for counter space saved and gets the job done just as good!
The first thing I decided to make with my spankin' new mixer was chocolate filled vanilla cupcakes.  I was beyond excited to use my mixer!  And let me tell you, baking will never be the same again!!  I am in love with it.
Now on to the cupcakes:
Chocolate Filled Vanilla Cupcakes~ The Dreams Weaver
What you will need:
Cupcake:
1/2 cup softened butter
3/4 cup sugar
2 eggs
2 tsp. vanilla extract
1 1/2  cup all-purpose flour
1/2 tsp. baking powder
1/4 tsp. salt
2/3 cup cold milk

Chocolate Filling:
1 cup milk
1 cup creme de cacao  
1/2 cup confectioner's sugar
3-4 TBSP. cocoa powder
2 TBSP flour

(Makes 1 dozen cupcakes)
Chocolate Filled Vanilla Cupcakes~ The Dreams Weaver
Preheat the oven to 350°F. 

Cream the butter and sugar.  Add eggs, 1 at a time, letting the mixer run in between each addition.  Add in vanilla.
Chocolate Filled Vanilla Cupcakes~ The Dreams Weaver
In a medium bowl, stir together all dry ingredients.  Slowly add the dry ingredients into the mixer.  Add in milk.
Chocolate Filled Vanilla Cupcakes~ The Dreams Weaver
Bake for 18-24 minutes.

Allow the cupcakes to cool on baking racks as you make the chocolate filling.
Chocolate Filled Vanilla Cupcakes~ The Dreams Weaver
In a medium pot, add the creme de cacao and turn the heat on high until it starts to bubble. Lower to medium heat and let that start to reduce. Add the milk, cocoa powder, and confectioner's sugar and whisk until completely combined. 
Allow this to reduce another 10-15 minutes, whisking occasionally. 
When the chocolate looks like it is thickening up, remove 1/4 cup of it into a small bowl in order to incorporate the flour evenly. Add the flour mixture back to the pot. 
Let the chocolate reduce for another 5-7 minutes, or until really thick. Once done, remove from heat and transfer to a container. 
I refrigerated my chocolate for an hour before piping it into the cupcakes as it was easier to handle.
{I was so excited about using my stand mixer for the first part that I totally forgot to take pictures as I was making the chocolate filling}
Once the cupcakes are completely cool, use a knife to cut a small circle in the middle of each.  Make sure that you don't cut all the way to the bottom of the cupcake, otherwise when you remove the paper the filling will run right out the bottom. 
Chocolate Filled Vanilla Cupcakes~ The Dreams Weaver
Fill a plastic bag {or a piping bag if you got one} with the chocolate filling.  I inserted the plastic bag into a glass and let the ends of the bag over hang the glass, it makes it easier to pour the chocolate into the bag. 
Chocolate Filled Vanilla Cupcakes~ The Dreams Weaver
Cut one of the corners off and you're ready to stuff those cupcakes!
Chocolate Filled Vanilla Cupcakes~ The Dreams Weaver
I topped off my cupcakes with just some packages Hershey chocolate frosting to make it extra decedant.
Chocolate Filled Vanilla Cupcakes~ The Dreams Weaver
 Enjoy!


 photo signature_zpsf75b5071.png

Friday, April 25, 2014

Easy Burrito Bowl


This burrito bowl looks so fancy and hard to make, and I sure fooled my husband at dinner last night! It's a great idea for a dinner party, or for date night like I did.  Continue reading to learn my secret!
Easy Burrito Bowl~ The Dreams Weaver

What you will need:
1 pound ground meat for the filling
Assorted veggies
Burrito spice mix
Salt
Pepper
Kale
Olive oil
Tortillas
Cupcake Tins
 
First, saute your veggies.  I started with an onion and let that brown first.  I then added garlic, carrot, mushroom, broccoli, and seasoned with salt and pepper.  
Once all the veggies were halfway cooked, I added my ground meat.  At this point I added my burrito spice mix, but if you don't have that I usually use a mixture of turmeric, cayenne pepper, paprika, and any other spices that you have laying around.
Keep stirring the meat so that it gets browned all around, and I chopped my meat pretty fine while I was stirring to get small bits.
After the meat is fully brown I added a bunch of kale to slightly wilt. If you don't like kale use spinach or cilantro.
Easy Burrito Bowl~ The Dreams Weaver
{Drum roll please...} Whip out your cupcake tins! What?! You ask, that can't be!  Yes, I've said it, turn those cupcake tins upside down and press in your tortillas to make a bowl shape. {Mind Blown!} It's that easy!
Easy Burrito Bowl~ The Dreams Weaver
 Now, fill your homemade bowls with your filling.  I topped mine off with some fresh cut tomatoes.  The tortillas will get crisp in the oven and will hold their bowl shape and prevent any liquids or filling dropping out.
Easy Burrito Bowl~ The Dreams Weaver
 Bake in the oven on 350° for 10 minutes, or until the tortillas slightly brown.
Easy Burrito Bowl~ The Dreams Weaver
 Voila! Burrito bowl complete!
Easy Burrito Bowl~ The Dreams Weaver
 photo signature_zpsf75b5071.png


Thursday, March 13, 2014

Hamantaschen Cookies

Today I have a delicious recipe for Hamantaschen that can be filled with whatever filling you desire! {Just think a cookie version of a burrito or taco}
Hamantaschen are a pocket filled cookie and are recognizable for their 3 cornered triangular shape. They are the traditional food eating during the Jewish holiday of Purim. They are usually filled with poppy seeds, prunes, apricot, apple, or any variety of fruit preserved.  I have even filled them with chocolate or marshmallows.
Why are they called Hamantaschen? The word itself is Yiddish for "Hamans pockets." Haman is the villain in the Purim story. We eat Hamantashen till today on Purim as part of the celebration of the holiday, which commemorates how the Jews escaped Haman's plans to massacre the entire Jewish population.
Why are the cookies triangularly shaped? Haman wore a 3 cornered hat.
Hamantaschen Cookies~ The Dreams Weaver

What you will need:
4 eggs
½ cup oil (or 1 cup margarine)
2 tsps. vanilla extract
1 Tbsp. orange juice
¾ cup sugar
4 cups flour
2 tsps. baking powder
Filling:
Strawberry preserves
Hamantaschen Cookies~ The Dreams Weaver
Preheat the oven to 350°.
Lay parchment paper down on cookie sheets.
Place all ingredients in a large mixing bowl and beat together. You may need to add a drop more juice or flour, depending on the consistency of the dough.
Hamantaschen Cookies~ The Dreams Weaver
Roll dough into a ball and then divide into 4 equal parts. Each ball will make 1 dozen Hamantaschen.
Divide the large ball into 12 equally sized small balls.
On a floured surface, flatten one of the balls into a flat 3” diameter circle.
Hamantaschen Cookies~ The Dreams Weaver
Place ½ to 2/3 teaspoon of your desired filling in the middle of each circle.
Hamantaschen Cookies~ The Dreams Weaver
To shape into a triangle, lift up right and left sides, leaving the bottom down, and bring both sides to meet at the center above the filling.
Hamantaschen Cookies~ The Dreams Weaver
Bring the top flap down to the center to meet the 2 sides. Pinch edges together.
Hamantaschen Cookies~ The Dreams Weaver
Place each Hamantaschen on the cookie sheets 1 inch apart and bake at 350° for 20 minutes.
Hamantaschen Cookies~ The Dreams Weaver

Enjoy!
 photo signature_zpsf75b5071.png

Friday, February 28, 2014

{No Bake} Cookie Dough Balls

I know I have been lacking on my posts for the past two weeks, but I am back!
I feel like a lot has happened since my last post...let me tell you in short:
- I took a trip up to New York for my mom's birthday 2 days before Valentine's Day {1 day before that super blizzard} and ended up staying an entire week! Why did I have all this time off? I decided to change jobs and had 2 weeks off in between...
- I got a new job! You're looking at the new {and only} Assistant Buyer for ThinkGeek!! I am back in the fashion industry, sort of.  So far I am loving it there, and the lack of suits required to wear to work.
- I found this new recipe that allows you to eat all the raw cookie dough you want, with no risk of salmonella! It uses applesauce instead of eggs, who knew? You can also bake them if you want a delicious cookie without the eggs. 
{No Bake} Cookie Dough Balls~ The Dreams Weaver
What you will need:
2/3 cup (1 1/3 sticks) butter, room temperature
¾ cup granulated sugar
¼ cup dark brown sugar, packed
¼ cup applesauce
1 teaspoon vanilla extract
1 ¾ cups all-purpose flour
½ teaspoon baking soda
½ teaspoon salt
6 blocks chocolate-almond bark
{No Bake} Cookie Dough Balls~ The Dreams Weaver
In an electric mixer, beat the butter, granulated sugar, brown sugar, applesauce and vanilla together until smooth.
{No Bake} Cookie Dough Balls~ The Dreams Weaver
Sift the flour, baking soda and salt together, and with the mixer running, slowly add to the butter mixture.
{No Bake} Cookie Dough Balls~ The Dreams Weaver
Scoop out the batter using a mini ice cream scoop and roll it into balls. Place the dough balls about an inch apart on a baking sheet lined with wax paper and transfer them to the freezer for 30 minutes to let the dough set up.
{No Bake} Cookie Dough Balls~ The Dreams Weaver
While the dough is chilling, melt the chocolate-almond bark in a heavy-bottomed saucepan over low heat, stirring constantly.

Remove the chilled dough balls from the freezer. Using two spoons, dip the balls one at a time in the melted chocolate, rolling them to coat fully.
{No Bake} Cookie Dough Balls~ The Dreams Weaver
Returned the dough balls to the wax paper-lined baking sheet and refrigerate until set, about 30 minutes.

Enjoy!

 photo signature_zpsf75b5071.png

Monday, December 23, 2013

Ginger Snap Cookies

This was my first attempt at ginger snap cookies, and they were a success on my first try! Each individual cookie is rolled in sugar, which gives it a great coat of sugar armor that protects the soft and slightly spicy ginger interior.
Ginger Snap Cookies~ The Dreams Weaver
This recipe makes 3 dozen cookies, or 2 dozen jumbo size cookies.

Prep Time: 15 minutes   Cook Time: 12 minutes   Total Time: 40 minutes

What you will need:
1 cup brown sugar
¾ cup canola oil
¼ cup maple syrup (or molasses)
1 egg
2 cups flour
2 tsps. baking soda
¼ tsp. salt
1 tsp. ground cinnamon
1 tbs. fresh ground ginger
1/3 cup white sugar for decoration
Ginger Snap Cookies~ The Dreams Weaver
Preheat oven to 375°F.

In a large bowl, mix together the brown sugar, oil, molasses, and egg.
Combine the flour, baking soda, salt, cinnamon, and ginger; stir into the molasses mixture.
Ginger Snap Cookies~ The Dreams Weaver
Roll dough into 1 ¼ inch balls. Roll each ball in white sugar before placing 2 inches apart on parchment paper lined cookie sheets.
Ginger Snap Cookies~ The Dreams Weaver
Bake for 10 to 12 minutes in preheated oven, or until center is firm. Let cool on wire racks.
Ginger Snap Cookies~ The Dreams Weaver

Enjoy!
Ginger Snap Cookies~ The Dreams Weaver
 photo signature_zpsf75b5071.png