Tuesday, October 24, 2017

Chicken & Butternut Squash Crockpot Dump

As it starts to get cold out, my crockpot is always on standby for easy weeknight meals. I love coming home to the smell of something warm cooking away in the kitchen all day knowing I didn’t have to spend hours prepping or standing over the hot stove. I know my dog on the other hand is smelling our dinner all day and can’t even get a taste of it.

This recipe is super easy and full of flavor. No prep needed other than chopping, dumping, and forgetting. {I don’t know how much forgetting is happening, as I think about dinner all day at work when the crockpot’s going!}

Chicken & Butternut Squash Crockpot Dump ~ The Dreams Weaver

What you will need:
6 boneless, skinless chicken thighs (about 1 ½ pounds total)
1 (1 ½ - 2 lb.) butternut squash, cubed
2 Tbsp. balsamic vinegar
4 cloves garlic, minced
1 Tbsp. sage
Pinch of each salt and pepper

Combine the chicken, butternut squash, vinegar, garlic, sage, salt, and pepper in your crockpot.
Cover and cook on low for 4-6 hours.
Chicken & Butternut Squash Crockpot Dump ~ The Dreams Weaver

Enjoy!

 photo signature_zpsf75b5071.png

Friday, October 20, 2017

Microwave Chocolate Mug Cake

Who doesn't love chocolate cake? I love chocolate cake, but whenever I get a chocolate cake craving, I am not going to make myself a giant cake! That's why I love this microwave chocolate mug cake. It's instant satisfaction for my chocolate craving and I don't need to share with anyone!
The Dreams Weaver ~ Microwave Chocolate Mug Cake

What you will need:
¼ cup flour
5 Tbsp. sugar
2 Tbsp cocoa powder
1 egg
3 Tbsp. milk
3 Tbsp. vegetable oil
Dash of vanilla extract
Dash of salt


Spray the mug generously with cooking spray and whisk all ingredients in a large mug until smooth. Microwave until puffed, about 2 minutes.

Enjoy!


 photo signature_zpsf75b5071.png

Thursday, October 19, 2017

Chocolate Pumpkin Whoopie Pies

I love anything pumpkin when it comes to Fall, and love my chocolate desserts so I thought why not combine the 2! This was my first try at making whoopie pies {I never have even tried one before making these} and I must say that they turned out pretty well!
The Dreams Weaver ~ Chocolate Pumpkin Whoopie Pies
These little whoopie pies would be great for a holiday party, or any potluck! They are much easier to transport than cupcakes, since the buttercream is sandwiched between the 2 sides of cake.

The cake is sturdy enough using only one egg to stand on its own as a whoopie pie base, but wasn’t crumbly or overly springy.

What you will need:
Cake:
2 cups Flour
½ cup Cocoa Powder
1 ¼ tsp. Baking Soda
1 tsp. Salt
1 cup Buttermilk (or 1 scant cup of milk + 1 Tbs. white vinegar)
1 tsp. Vanilla
½ cup Butter
1 cup Brown Sugar
1 Egg

Filling:

4 oz. cream cheese
¼ cup Butter
¼ cup Pumpkin Puree 
½ cup Powdered Sugar
1 tsp. Vanilla
½ tsp. Pumpkin Pie Spice
Pinch of Salt


The Dreams Weaver ~ Chocolate Pumpkin Whoopie Pies

Preheat the oven to 350°F. 

Beat the butter and brown sugar until fluffy. Add the egg and mix until just combined.


At low speed, alternate adding buttermilk and the flour and cocoa, starting and ending with the buttermilk. Add the baking soda, salt, and vanilla and mix until combined.

The Dreams Weaver ~ Chocolate Pumpkin Whoopie Pies
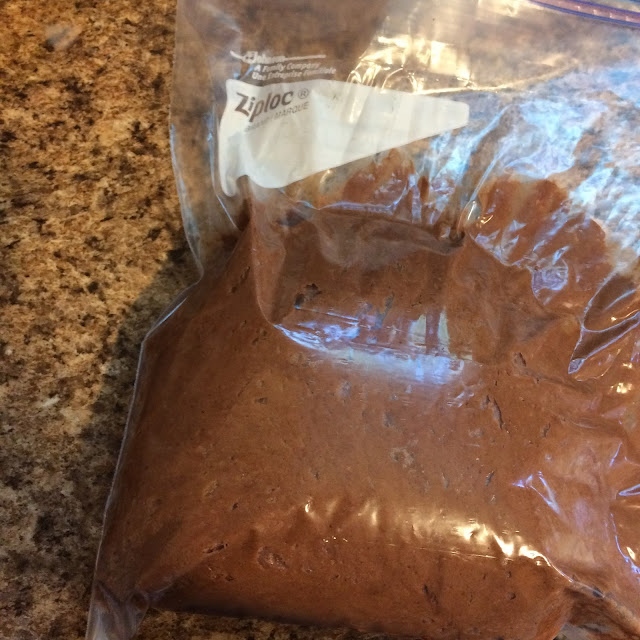
Scoop small batter mounds on to a cookie sheet lined with parchment paper with at least an inch of space in between pies as they will expand. If you use a heaping teaspoon of batter, you will get mini whoopie pies and will make about 24 pies. If you use a heaping tablespoon of batter, you will get normal sized whoopie pies and will make about 16 pies. I made 24 small for my batch. {I dumped my cake batter into a Ziploc bag and cut the tip off, which made it easier to get perfectly round and even-sized pies}
The Dreams Weaver ~ Chocolate Pumpkin Whoopie Pies

The Dreams Weaver ~ Chocolate Pumpkin Whoopie Pies

Bake the pies for about 10-12 minutes. Once the cakes come out of the oven, place them on a cooling rack to cool completely.
The Dreams Weaver ~ Chocolate Pumpkin Whoopie Pies

For the Filling: Beat the cream cheese and butter with an electric mixer on medium-high speed in a medium bowl until smooth and creamy. Add the pumpkin puree and beat to combine. Add the confectioners' sugar, pumpkin pie spice and salt and beat to combine.


Assemble the pies by finding two halves that match in size. Pipe frosting starting in the middle of one cake half and working your way in a spiral to the outside edges. Sandwich another cake on top. Refrigerate to chill before serving.
The Dreams Weaver ~ Chocolate Pumpkin Whoopie Pies

Enjoy!


Wednesday, October 18, 2017

Witch Finger Cookies

I made these little severed fingers last year for my company's Halloween bake-off and won! They were a great hit, and everyone loved the taste of them in additional to their gruesome look!

What you will need
2 cups all-purpose flour 
½ teaspoon baking powder 
1/4 teaspoon fine salt 
½ cup (1 stick) unsalted butter, at room temperature 
1 cup sugar 
1 large egg, at room temperature 
1 teaspoon pure vanilla extract 
28 large sliced almonds 

½ cup raspberry jam 


Preheat the oven to 325°F. 


Spray a rimmed baking sheet with vegetable oil cooking spray or line with a silicone baking mat. Set aside.


In a medium bowl, whisk together the flour, baking powder and salt. Set aside.


In the bowl of a stand mixer fitted with the paddle attachment, beat the butter and sugar together until light and fluffy, scraping down the sides of the bowl with a spatula as needed, about 2 to 3 minutes. Beat in the egg and vanilla until smooth. Gradually beat in the flour mixture until a dough forms.


Using about 1 
½ tablespoons of dough at a time, roll the dough between your palms into 5-inch-long fingers about ½-inch thick. Firmly press a sliced almond into the end of each finger to make fingernails. Make several horizontal cuts, about 1/4 inch deep and ½ inch long, in the center of each finger to make knuckles. Press the dough on either side of the cuts to shape the knuckles. Arrange the fingers on the prepared baking sheet and bake until light golden, 16 to 18 minutes. Transfer the fingers to a wire rack and cool completely.


In a small saucepan, heat the jam over low heat until warm, about 2 minutes. Dip the blunt ends of the fingers in the warm jam and arrange on a platter.

Enjoy!


Tuesday, August 1, 2017

Cherry Apple Mini Crumbles

I have been lacking in my blog posts for a long time and am trying to get back into it! Bought a house just about a year ago and it has been consuming most of my free time. 
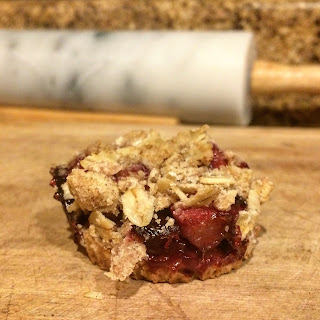
I made these cherry apple mini crumbles over the weekend, and they are seriously easy to make and great for Summer!
The Dreams Weaver ~ Cherry Apple Mini Crumbles
What you will need:
For the crumble:
½ cup rolled oats
½ cup flour
1 tsp. cinnamon
Pinch of salt
1/3 cup  maple syrup
2 tbsp. cold butter, cut into small pieces

For the apple filling:
2 apples, peeled, cored, and diced
Handful of cherries, pitted (or canned cherries)
2 tbsp maple syrup
½ cup water

Preheat the over to 350°F.

Lightly coat a 12-cup muffin pan with cooking spray.

To make the crumble topping: combined the oats, flour, cinnamon, and salt in a bowl. Stir in maple syrup until well coated. Use a fork to smash the butter pieces into the oat mixture until crumbly.
The Dreams Weaver ~ Cherry Apple Mini Crumbles
To make the apple filling: add apples, maple syrup, and water to a small saucepan.  Cook over medium heath, stirring occasionally, for about 5 minutes. Remove from heat and allow to cool slightly.
The Dreams Weaver ~ Cherry Apple Mini Crumbles
To assemble: place 1 tsp of the oat mixture into the bottom of each muffin cup. Use your fingers to gently press down to form a solid crust.
The Dreams Weaver ~ Cherry Apple Mini Crumbles
Place 1 tbsp of the filling over each oat base.
The Dreams Weaver ~ Cherry Apple Mini Crumbles
Top each muffin cup with the remaining crumble.
The Dreams Weaver ~ Cherry Apple Mini Crumbles
Bake for 10-15 minutes or until golden brown. Remove from the oven, let cool to room temperature, then use an offset spatula to gently remove from the pan.

Serve and enjoy!
The Dreams Weaver ~ Cherry Apple Mini Crumbles


Friday, April 7, 2017

Cheesy Spaghetti Pie

I was trying to figure out something new to make with pasta. There is the traditional mac n cheese, or baked ziti, lasagna, penne vodka... But, I could not think of anything when it came to spaghetti....until I thought of spaghetti pie! 
The Dreams Weaver ~ Cheesy Spaghetti Pie
What you will need:
1 pound cooked spaghetti, cooled 
½ cup marinara sauce
½ cup grated cheese blend (or mozzarella)
4 eggs
Salt and freshly ground black pepper
Pinch of paprika
2 tablespoons olive oil 
The Dreams Weaver ~ Cheesy Spaghetti Pie
Preheat the oven to 450°F.
Make the spaghetti according to the box directions.
The Dreams Weaver ~ Cheesy Spaghetti Pie
Mix the cooled spaghetti, grated cheeses and eggs together in a large bowl. Sprinkle with salt, pepper, and paprika. 

Add the oil to a large nonstick sauté pan or round baking dish and place in oven to heat up. 

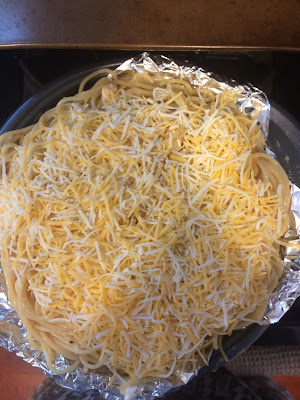
Once hot (around 5 minutes), add a handful of the spaghetti mixture to the pan and flatten it out to the edges. Lay the cheese on top and add another layer of the spaghetti mixture. Top with more cheese. 
The Dreams Weaver ~ Cheesy Spaghetti Pie
Cook for about 20 minutes or until golden brown. 
The Dreams Weaver ~ Cheesy Spaghetti Pie

Turn out onto a cutting board, slice as you would a pizza and serve.

Enjoy!

 photo signature_zpsf75b5071.png

Wednesday, April 5, 2017

Individual Chicken Pot Pie

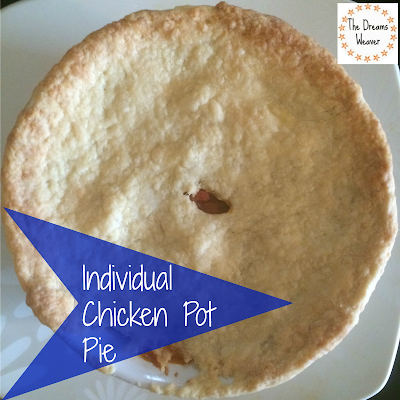
I love anything that is cute and individual portion sized. That is why I decided to make chicken pot pie in little ramekins instead of one big pot pie. They are perfect for a dinner party, or for just my husband and I and freeze the rest for easy dinners!
The Dreams Weaver ~ Individual Chicken Pot Pie
What you will need:
3 whole (6 split) chicken breasts
3 tablespoons olive oil
Kosher salt
Freshly ground black pepper
Paprika
5 cups chicken stock (or water with bouillon cubes or consommé added)
½  stick unsalted margarine
2 cups yellow onions, chopped (2 onions)
2 cloves garlic
¾ cup all-purpose flour
2 cups medium-diced carrots
1 cup button mushrooms sliced
1 head broccoli cut into florets 
1 (10-ounce) package frozen peas (2 cups)
1 ½ cups frozen small whole onions (optional)
½ cup minced fresh parsley leaves

For the pastry:

Pie dough (recipe here) or any store-bought pastry or pie dough sheets
The Dreams Weaver ~ Individual Chicken Pot Pie

Place the chicken breasts in a cast iron skillet and rub them with olive oil. Sprinkle generously with salt, pepper, and paprika. Cook for 12-15 minutes, or until cooked through. Set aside until cool enough to handle. 

The Dreams Weaver ~ Individual Chicken Pot Pie
Cut the chicken into large dice. You will have 4 to 6 cups of cubed chicken.
The Dreams Weaver ~ Individual Chicken Pot Pie
In a small saucepan, heat the water (or stock) and dissolve the chicken consommé flavoring in the water. 
In a large pot or Dutch oven, melt the margarine and sauté the onions over medium-low heat for 10 to 15 minutes, until translucent. Add in the carrots and cook for another 5 minutes.
The Dreams Weaver ~ Individual Chicken Pot Pie
Add the flour and cook over low heat, stirring constantly, for 2 minutes. 
The Dreams Weaver ~ Individual Chicken Pot Pie
Add the hot chicken stock to the sauce. Simmer over low heat for 1 more minute, stirring, until thick. Add 2 teaspoons salt, and ½ teaspoon pepper. Add the cubed chicken, peas, mushrooms, broccoli, onions and parsley. Mix well.
The Dreams Weaver ~ Individual Chicken Pot Pie
Once the pie dough is made, dump the dough out onto a floured board and knead quickly into a ball. Wrap the dough in plastic and allow it to rest in the refrigerator for 30 minutes.
Preheat the oven to 375°F.

Divide the filling equally among 6 ovenproof bowls. 
The Dreams Weaver ~ Individual Chicken Pot Pie
Divide the dough into 6 pieces and roll each piece into an 8-inch circle. Brush the outside edges of each bowl with the egg wash, then place the dough on top. Trim the circle to ½-inch larger than the top of the bowl. Crimp the dough to fold over the side, pressing it to make it stick. Brush the dough with egg wash and make 3 slits in the top. 
The Dreams Weaver ~ Individual Chicken Pot Pie
Place on a baking sheet and bake for 1 hour, or until the top is golden brown and the filling is bubbling hot.
The Dreams Weaver ~ Individual Chicken Pot Pie
Enjoy!

 photo signature_zpsf75b5071.png

Monday, April 3, 2017

Cherry Clafouti

I love trying out new dessert recipes and I love the sound of this dessert "kla-FOO-tee."
The Dreams Weaver ~ Cherry Clafouti
What you will need:
1¼ cup milk
2⁄3 cup sugar, divided
3 eggs
1 tablespoon vanilla
1⁄8 teaspoon salt
1⁄2 cup flour
3 cups cherries, pitted
powdered sugar, for garnish
Preheat oven to 350°F.
Using a blender, combine the milk, 1/3 cup sugar, eggs, vanilla, salt and flour, and blend.
Lightly butter an 8-cup baking dish, and pour a 1/4-inch layer of the blended mixture over the bottom. Set remaining batter aside.
Place dish into the oven for about 7-10 minutes, until a film of batter sets in the pan but the mixture is not baked through. Remove from oven (but don’t turn the oven off, yet).
Distribute the pitted cherries over the set batter in the pan, then sprinkle with the remaining sugar. Pour the remaining batter over the cherries and sugar.
Bake in the preheated oven for 45 to 60 minutes, until the clafouti is puffed and brown and a knife inserted into the center comes out clean.
Sprinkle with powdered sugar and serve warm.
Servings: 6-8 for dessert, 4 for breakfast.
 photo signature_zpsf75b5071.png