Wednesday, May 28, 2014

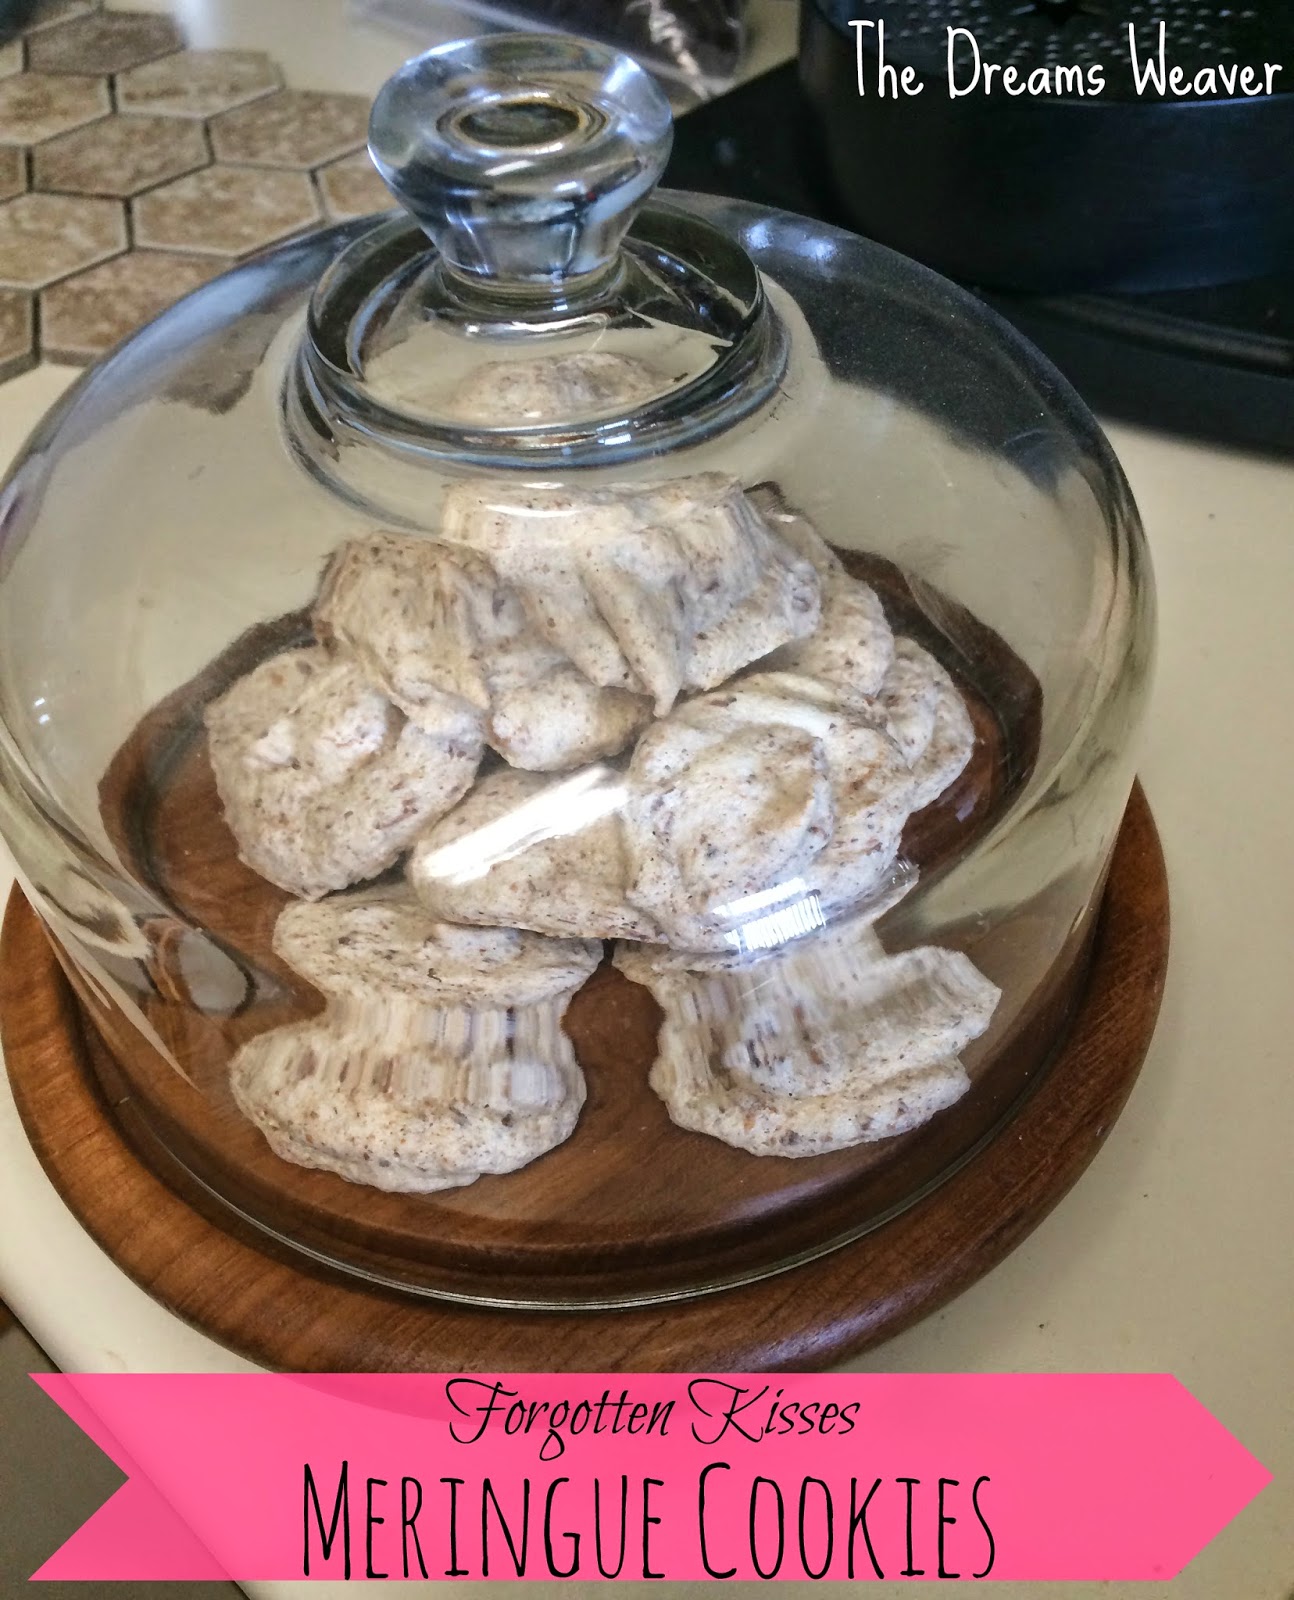
Forgotten Kisses Meringue Cookies

This past weekend I tried out something new with my stand mixer. Have I said lately how much I LOVE my KitchenAid mixer? I don’t know how I lived without it. It’s like having an extra set of hands, but better than the hubby’s who’d be eating any of my raw confections before they can make it to the oven. 

Meringues are light, airy, delicious and low fat! You can add all different nuts, chocolate, sprinkles, food coloring, extracts…the possibilities are endless! And it’s amazing how far so few ingredients can take you. 

Forgotten Kisses Meringue Cookies~ The Dreams Weaver

What you will need: 
2 egg whites at room temperature 
½ tsp. baking powder 
2/3 cup sugar 
1 tsp. vanilla extract 
1 cup toasted almonds or chocolate chips, optional 
½ tsp. cinnamon, optional 
Yields 2 dozen 
Forgotten Kisses Meringue Cookies~ The Dreams Weaver
Ignore the 4 eggs- I made two batches in the same day
Preheat the oven to 350°. 
In the bowl of an electric mixer {or hand mixer}, beat egg whites until foamy. {It should almost look like sudsy soapy water.} 
Forgotten Kisses Meringue Cookies~ The Dreams Weaver
Add the baking powder and beat until fluffy, but on at all dry. Be careful not to overbeat. Add the sugar in gradually, 3 tablespoons at a time. When about half of the sugar has been added, add the vanilla extract {and cinnamon if you're using}. 
Forgotten Kisses Meringue Cookies~ The Dreams Weaver
Continue beating and adding the remaining sugar in increments until all of the sugar is dissolved and the meringue is shiny and tight. 
Forgotten Kisses Meringue Cookies~ The Dreams Weaver
Gently fold in the chopped nuts or chocolate chips. 
Forgotten Kisses Meringue Cookies~ The Dreams Weaver
Working one teaspoon at a time, push a teaspoonful of meringue from the tip of 1 teaspoon with the back of another teaspoon onto parchment lined baking sheet, leaving an inch between the meringues. 
Forgotten Kisses Meringue Cookies~ The Dreams Weaver
Place the baking sheets in the preheated oven and turn the oven off. Leave the cookies undisturbed in the oven for at least two hours, or even overnight, until the meringues are crisp and dry. 
Forgotten Kisses Meringue Cookies~ The Dreams Weaver
Enjoy! 
Forgotten Kisses Meringue Cookies~ The Dreams Weaver

 photo signature_zpsf75b5071.png

Friday, May 23, 2014

New Fashion Obsession: Kate Spade Staurday


Kate Spade is one of my favorite designers, I have tons of her bags and jewelry.  But, this week I ventured over to her new line Kate Spade Saturday. The stuff on the site is definitely more wallet friendly and I love that it has free shipping on everything and free returns. That means, more for me to buy and say I will only keep my favorites and totally not return anything!!

I just placed my first order this week and it should be arriving today!!

Oh, and what I love even more, it racking up points for liking and sharing my favorite items.  The more points you get, the more free stuff you get! I currently only have 78 points, but I just started two days ago! I'm eying the 5,000 point Weekender Bag.

New Fashion Obsession: Kate Spade Staurday ~ The Dreams Weaver

Some of the goodies I got (plus an extra May discount!)
New Fashion Obsession: Kate Spade Staurday ~ The Dreams Weaver
Assembly Crossbody Bag {$66.50 $49.87}- I love the color of this bag and it's so roomy for all my stuff, plus it can be worn multiple ways!

New Fashion Obsession: Kate Spade Staurday ~ The Dreams Weaver
Mesh Tube Necklace in Metal {$14.00 $11.90}- i love how simple and elegant this necklace is, it can be worn with so many things.
May28th & Kate Spade Saturday Watch In Signature Zig Zag {$35.00 $29.75}- Exclusive collaboration, it reminds me of my mom's old Swatch watches and a girl can never have too many watches.

What do you love from Kate Spade Saturday? 


 photo signature_zpsf75b5071.png

Thursday, May 22, 2014

What I Wore Wednesday


This Week it is finally beginning to look a bit like summer!!! I am so happy with Memorial day right around the corner! Summer is my favorite season, and it is always way too short. Am I right? I cannot wait to spend weekends lounging by the pool, soaking up the sun {and getting in a few laps too!}
Yesterday I wore a floor length, I guess you would call maxi dress.  I am in love with the fit and comfort of the dress. This is actually one of the first floor length summer dresses I have ever worn! 
What I Wore Wednesday~ The Dreams Weaver
 Sounds a little crazy, but every time I fall in love with one of those long flowy dresses, they always crush my dream when I end up swimming in the length of it. But not this one! I think it's actually a junior's dress, but I don't care I still love the fit of it. Oh, and the armpits are not super saggy so your bra does not show! {Huge problem for me when I buy tanks or sleeveless tops}
Jet was trying to be the center of attention last night, like he always is, and get in the way of a good photo. Took three shots, but finally got him to sit politely for a second to snap a good one.
What I Wore Wednesday~ The Dreams Weaver
The necklace is silver spiked with shiny crystals that my sister got for my birthday two years ago.
What I Wore Wednesday~ The Dreams Weaver
 On a side note, the hubby sent flowers and chocolates to my work last week for no reason. I got a few people jealous there! And most are still alive a week later, with little sunlight in the office!
What I Wore Wednesday~ The Dreams Weaver
Happy Thursday all!  Only two more days until a long needed Memorial Day weekend! Can't wait for beach and barbecue with firends!
What are your plans?
 
 photo signature_zpsf75b5071.png

Friday, May 16, 2014

Chocolate Filled Vanilla Cupcakes

The other week I finally decided to splurge on a KitchenAid stand mixer.  I had put one on my wedding registry, hoping someone would be ever so generous to spend the $350 on the 5 quart Ice KitchenAid stand mixer.  Well, that never happened!  So, while I did not get the exact one I wanted, I got the cobalt blue 4.5 quart stand mixer, a little cheaper and 1/2 quart smaller bowl.  A little smaller, which is actually a plus for counter space saved and gets the job done just as good!
The first thing I decided to make with my spankin' new mixer was chocolate filled vanilla cupcakes.  I was beyond excited to use my mixer!  And let me tell you, baking will never be the same again!!  I am in love with it.
Now on to the cupcakes:
Chocolate Filled Vanilla Cupcakes~ The Dreams Weaver
What you will need:
Cupcake:
1/2 cup softened butter
3/4 cup sugar
2 eggs
2 tsp. vanilla extract
1 1/2  cup all-purpose flour
1/2 tsp. baking powder
1/4 tsp. salt
2/3 cup cold milk

Chocolate Filling:
1 cup milk
1 cup creme de cacao  
1/2 cup confectioner's sugar
3-4 TBSP. cocoa powder
2 TBSP flour

(Makes 1 dozen cupcakes)
Chocolate Filled Vanilla Cupcakes~ The Dreams Weaver
Preheat the oven to 350°F. 

Cream the butter and sugar.  Add eggs, 1 at a time, letting the mixer run in between each addition.  Add in vanilla.
Chocolate Filled Vanilla Cupcakes~ The Dreams Weaver
In a medium bowl, stir together all dry ingredients.  Slowly add the dry ingredients into the mixer.  Add in milk.
Chocolate Filled Vanilla Cupcakes~ The Dreams Weaver
Bake for 18-24 minutes.

Allow the cupcakes to cool on baking racks as you make the chocolate filling.
Chocolate Filled Vanilla Cupcakes~ The Dreams Weaver
In a medium pot, add the creme de cacao and turn the heat on high until it starts to bubble. Lower to medium heat and let that start to reduce. Add the milk, cocoa powder, and confectioner's sugar and whisk until completely combined. 
Allow this to reduce another 10-15 minutes, whisking occasionally. 
When the chocolate looks like it is thickening up, remove 1/4 cup of it into a small bowl in order to incorporate the flour evenly. Add the flour mixture back to the pot. 
Let the chocolate reduce for another 5-7 minutes, or until really thick. Once done, remove from heat and transfer to a container. 
I refrigerated my chocolate for an hour before piping it into the cupcakes as it was easier to handle.
{I was so excited about using my stand mixer for the first part that I totally forgot to take pictures as I was making the chocolate filling}
Once the cupcakes are completely cool, use a knife to cut a small circle in the middle of each.  Make sure that you don't cut all the way to the bottom of the cupcake, otherwise when you remove the paper the filling will run right out the bottom. 
Chocolate Filled Vanilla Cupcakes~ The Dreams Weaver
Fill a plastic bag {or a piping bag if you got one} with the chocolate filling.  I inserted the plastic bag into a glass and let the ends of the bag over hang the glass, it makes it easier to pour the chocolate into the bag. 
Chocolate Filled Vanilla Cupcakes~ The Dreams Weaver
Cut one of the corners off and you're ready to stuff those cupcakes!
Chocolate Filled Vanilla Cupcakes~ The Dreams Weaver
I topped off my cupcakes with just some packages Hershey chocolate frosting to make it extra decedant.
Chocolate Filled Vanilla Cupcakes~ The Dreams Weaver
 Enjoy!


 photo signature_zpsf75b5071.png

Wednesday, May 14, 2014

Gillette Venus VoxBox

Yesterday I received my Gilette Venus Snap with Embrace travel mini razor from Influenster. I was beyond excited to open my box. I have been looking for a smaller razor to pack when I go to the gym or vacations. 
This razor fits in the palm of my hand and has a small round pink grip that allows me to hold it comfortably with my thumb while shaving.  
It also comes in a translucent blue carrying case to protect you from it's sharp blades while traveling. 
I can't wait to go on vacation somewhere to bring this with me and hopefully save some room in my toiletries bag.


Thursday, May 8, 2014

Sharpie Painted Ceramic Mug

I have seen this sharpie craze all over Pintrest.  I must have pinned at least a dozen ideas that I wanted to try with my Sharpies, and now it's finally here!  One more thing I can check off my gigantic Pintrest to-do list!
Sharpie Painted Ceramic Mug~ The Dreams Weaver
What you will need:
Ceramic item
Sharpie (I used black, but you can use any color or colors)
Print out of design to stencil 
Clear packing tape
X-acto Knife
Ruler
Sharpie Painted Ceramic Mug~ The Dreams Weaver
First, I printed out my design on my inkjet printer.  You can totally freehand your design, but I wanted to do the NYC skyline and I wanted it to be exact!
Sharpie Painted Ceramic Mug~ The Dreams Weaver
Next, I covered my sheet of paper in strips clear packing tape.  Once your entire sheet is covered in plastic, smooth out any air bubble.  This will be the {sticky} stencil!
Sharpie Painted Ceramic Mug~ The Dreams Weaver
Submerge your plastic coated paper in water for ten minutes.
When it's ready to be taken out, it will curl up on itself.  Lay out the sheet on a flat surface, like your counter, plastic side down.
Sharpie Painted Ceramic Mug~ The Dreams Weaver
Now it's time to remove all the paper.  Rub your finger back and forth over the paper and it will start to lift off.  Keep rubbing until all the white paper is gone and all you are left with is your design. 
Sharpie Painted Ceramic Mug~ The Dreams Weaver
Now it's time to cut out that design!  Cut away the entire colored area {that part is not sticky since it took to the color from the paper.}  You can use this using plain old scissors, or I used an X-acto knife and ruler with the sticky side facing up. 
What I realized the hard way only AFTER I finished, was that it would have probably been easier to cut away the design before submerging the sheet in water.  That way you don't have to deal with a sticky stencil in order to cut out the design!
Sharpie Painted Ceramic Mug~ The Dreams Weaver
Now you are ready to stick that stencil to your mug.  Trace the outline of the design {or fill in the entire area if you have the patience} with a fine Sharpie.
Sharpie Painted Ceramic Mug~ The Dreams Weaver
Place your mug in a cool oven, set the oven to 450.  Once it gets up to temperature, leave the oven on for 20 minutes.  After 20 minutes, turn off the oven.  Leave the mug in the oven for 2-3 hours, or until completely cooled.
This process heats the glaze of the mug allowing the Sharpie ink to incorporate into it so that it will not wash off.
Please note that this mug will probably no longer be dishwasher safe if you want your design to last.
Sharpie Painted Ceramic Mug~ The Dreams Weaver
Now you are ready for some coffee drinking {or whatever else is your morning cup}!!

 photo signature_zpsf75b5071.png

Wednesday, May 7, 2014

Spring 2014: Hometown Carabox Reveal!

This past month a participated in my first Cara Box Exchange! If you don't know what this is, head over to Wifessionals to learn more and sign up for the next one in June! 
Spring 2014: Hometown Carabox Reveal!~ The Dreams Weaver

The only requirement for the Cara Box exchange is an Instagram account to get to know your partners.  You are paired up based on an age bracket {ie. 20s, 30s...}  
You are paired with one girl to give a Cara Box to and one girl to receive a Cara Box from.  This Cara Box's theme was hometown.  We were to send out partners items from our hometowns based on the likes and interests of our partner.
I was paired with Tiffany and Amy and was able to get to know more about them via their Instagram photos and emails.
Amy was born in New York like me, but she has moved a lot since then...MA, CA, and now WA!  She loves coffee like I do, and her husband even works for an espresso machine company!  In her spare time she likes to paint, crochet, cook, and eat out. {I sent my New York box to Amy}
Tiffany is a southern girl from Alabama!  She is a pediatric nurse, she has two stepchildren {one's name is my last name!} and an 8 month old baby that she loves posting Instagram photos and videos of.  In her free time she likes to go on dates with her husband, play with her kids, and go shopping.
Spring 2014: Hometown Carabox Reveal!~ The Dreams Weaver
My Cara Box came from Tiffany all the way from Alabama.  
Keychain- Roll Tide, Alabama football
Starbucks cup
Tea- to make southern sweet tea
Monogram bag- southerners like monograms
Eyeshadow- Alabama colors purple and gold {except I had a purple explosion all over from my mailman}
Sparkly ponytails that can double as bracelets

 photo signature_zpsf75b5071.png

Thursday, May 1, 2014

What I Wore Wednesday

Today we were going on day 3 of rain, I am almost forgetting what the sun looks like! On the plus side, I hope all of this rain helps with easing my allergies {which I'm sure a lot of you are suffering from too.}

I wanted to wear something bright and cheery today to help with all of the doom and gloom outside!
What I Wore Wednesday~ The Dreams Weaver

Tee: Cotton On

What I Wore Wednesday~ The Dreams Weaver

Crochet Spike Necklace: gift from my Mom from C Wonder

What I Wore Wednesday~ The Dreams Weaver

Watch: Michael Kors (it's actually men's, but I love oversize watches)

What I Wore Wednesday~ The Dreams Weaver
 Shoes: Steve Madden
 photo signature_zpsf75b5071.png