I’ve suffered through one too many batches of burned or soggy kale chips. It took me a while to master my baked kale chip recipe, but I’ve learned some valuable lessons along the way and I’d like to pass my tips along to you!
You want a balance between crispiness and chewiness, without tasting burned. When baked properly, they really do make the perfect base for a satisfying chip alternative. They are also a super food and have many health benefits.
With these few easy techniques you’ll be well on your way to kale chip heaven. No dehydrator required!
What you will need:
Kale
Olive oil
Sea salt or other seasonings (optional)
1. Remove the stems and tear leaves into large pieces. Remove the stems very quickly by grabbing the base of the stem with one hand and pushing outwards along the stem to slide off the leaves.
2. Wash and thoroughly dry the leaves before beginning.
If the leaves aren’t properly dried, the water can “steam” the kale chips while baking and lead to the dreaded soggy kale chip. Be sure they are nice and dry before you add in the oil.
3. Don’t skimp the oil, but don’t drench it in oil either
A little bit of extra virgin olive oil goes a long way. I like to use ½ TBSP. of oil per baking sheet of kale chips. Rub the oil into the leaves to ensure all of the leaves are coated. Oil also helps the spices stick to the leaves.
4. Spread kale into a single layer on a parchment lined baking sheet. Be sure to rotate the baking sheet halfway through baking.
5. It’s all about the low-heat for even baking. It takes a bit longer to bake, but I can assure you it’s worth it because you don’t get any burnt pieces. The goal is to crisp the kale, not scorch it into little black burnt pieces! In my oven, I bake at 300 for 10 minutes, then I rotate the pan, and bake for another 15 minutes.
6. Cool for just a few minutes on the baking sheet. This allows the kale chips to crisp up even more once they are out of the oven.
Enjoy!
▼
Tuesday, January 27, 2015
Friday, January 16, 2015
Swirled Sugar Cookies
I use my basic sugar cookie recipe to make all sorts of treats. From football sugar cookies, to heart-shaped sugar cookies, to swirled, it’s a great recipe to have on hand and modify to suit your needs. Follow along for a quick tutorial on making these colorful swirled cookies using this sugar cookie recipe for the dough (and baking instructions), sure to please all your sweet tooth needs!
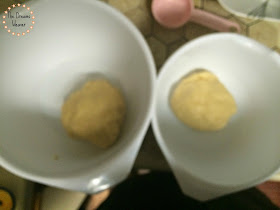
Make up a batch of sugar cookie dough, divide and place into 2 separate bowls.
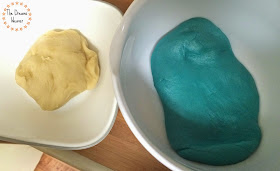
Knead food coloring into one of the parts of dough. I made one half aqua and left the other half as is. Chill the dough in the fridge for an hour or even overnight.
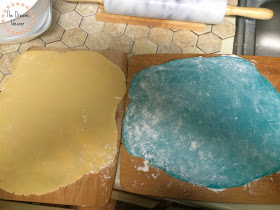
On a lightly floured surface, roll out each ball of dough separately to about 1/4" thickness.
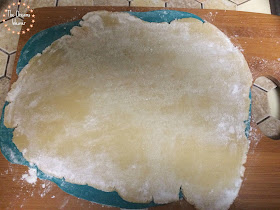
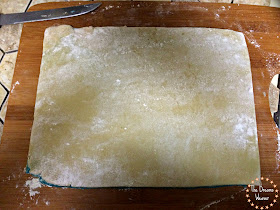
Apply a little water to the colored layer of dough to help the layers stick together. Lay the uncolored dough on top of the darker colored layer of dough.
Trim the edges so you end up with a neat rectangle.
Save the scraps! You can still bake the scraps up into yummy cookies! They’ll just look ‘marbled’.
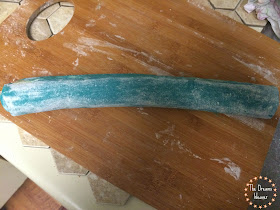
Start rolling your dough gently from one of the wider ends, brushing water on the dough as you roll it up. Once it’s rolled up, you can work the log to even it out if the middle is thicker then the ends, and to even out any gaps.
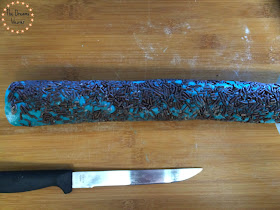
Pour out some sprinkles, brush the outside of the log more water and roll it in the sprinkles. Wrap the dough in plastic wrap and freeze for an hour, or stick in the fridge for a couple hours.
Once chilled, slice the dough with a sharp, thin blade into 1/4" rounds.
Bake according to recipe directions. Voila! Pretty, swirly cookies!
Enjoy!

Thursday, January 15, 2015
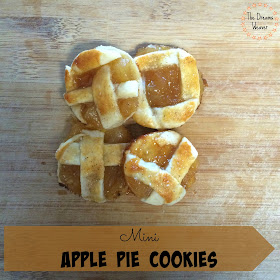
Mini Apple Pie Cookies
These mini apple pie cookies are made of real pie crust layered with gooey caramel, and a layer of apple pie filling, topped with a flaky and adorable cinnamon sugar lattice crust.
Each and every bite offers the very best part of an actual apple pie, with all of the convenience of a cookie! No utensils or plate required! Seriously the best cookie I’ve ever had! I can't help but want to eat the entire batch~
What you will need:
1 batch of my pie dough, recipe here, or buy the ready made kind
1 can of apple pie filling {just enough for a thin layer}
1 cup of caramel sauce {just enough for a light coating}
1 egg
2 tbsp. cinnamon sugar
A round cookie cutter, any size you like
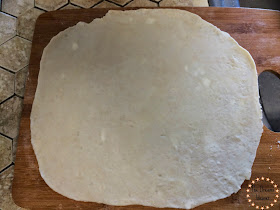
Lay out half of the pie dough {or 1 sheet if using store bought dough}, sprinkle it with some flour and slightly roll it out.
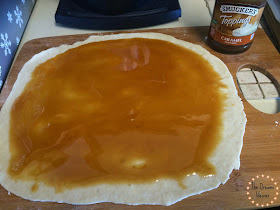
Pour some of the caramel sauce onto the crust and evenly spread it around, creating a thin layer of caramel.
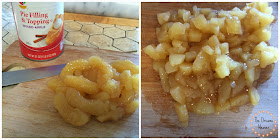
Coarsely chop the apple pie filling into small pieces, you don't want giant chunks in your delicate cookies.
Top the caramel layer with a thin layer of the chopped up apple pie filling, making sure not to add too much pie filling.
Roll out the other half of pie dough, the same size as the first sheet, and cut it into thin strips.
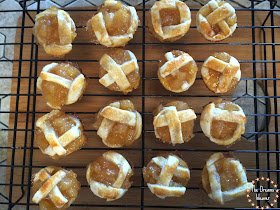
Create a lattice crust {just like on a pie} for the top of the pie filling. You can create the lattice,{just like a real pie!} right on top of the filling. Or, you can do what I did, I created the lattice on a floured board and then flipped on top of the filling.
Now it's time to cut out your pie cookies!
Once the cookies are all cut, brush the tops of them with some egg wash and sprinkle them with cinnamon sugar.
Place them onto a baking sheet and bake them at 350 degrees for 20-25 minutes, until they’re golden and firm.
Let them cool just a little..
Now, get ready to bite into the juiciest, chewiest apple pie cookie ever!
Enjoy!

Wednesday, January 14, 2015
Easy Pie Dough
Pie dough is an easy base for many different types of pie recipes. There's apple pie, blueberry pie, pumpkin pie, ice cream pie...I can go on and on about all of the pies out there, but let's get down to pie business. Pie dough is extremely easy to make last minute!
Sorry for the lack in images for this post! I was so excited to make pie dough for the first time that I forgot to snap any! {images coming soon!}
What you will need:
1 1/4 cups all-purpose flour
1 tbsp. sugar
1/4 tsp. salt
8 tbsp. (1 stick) cold unsalted butter, cut into 1/4-inch cubes
3 tbsp. very cold water
In a large bowl, stir together the flour, sugar and salt. Using a pastry cutter, cut the butter into the flour mixture until the texture resembles coarse cornmeal, with butter pieces no larger than small peas. Add the water and mix with a fork just until the dough pulls together.
Transfer the dough to a work surface, pat into a ball and flatten into a disk. Lightly flour the work surface, then flatten the disk with a rolling pin. Lift the dough and give it a quarter turn. Lightly dust the top of the dough or the rolling pin with flour as needed, then roll out into a round at least 12" in diameter and about 1/8" thick.
This recipe makes enough dough for one 9-inch single-crust pie, or mini apple pie cookie that I will show you how to make tomorrow! They're dangerously addictive!


