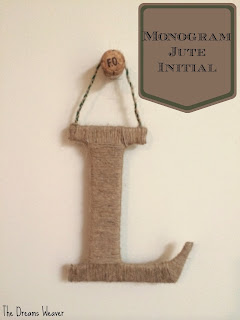
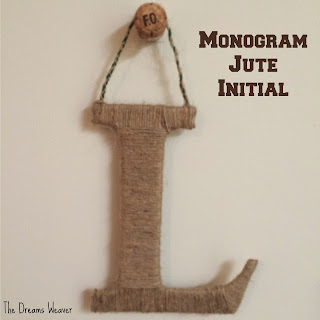
I always love the letters I see in home goods stores to display on a mantle or bookshelf, but they always are so expensive! And, when they do go on sale, all of the good letters are sold out. Instead of waiting around for one, I decided to make my own. It's really cheap and easy too.
What you will need:
Cardboard
Jute (mine only cost $1 for 3 rolls at the dollar store)
Hot glue gun
The first thing you need to do is figure out the size and font type you want your letter to be. I used Word and made my letter fill the whole page and printed it. Then you want to cut out 2 cardboard letters from the letter you printed (or more if you want your letter thicker.)
Lay the 2 cardboard letters on top of each other. To make sure the jute was secure when I started wrapping it around the letter, I wedged the tail of it between the 2 cardboard letters.
Start wrapping the jute around the cardboard. Make sure that it is tight around the cardboard, otherwise it will unravel.
You want the jute to pretty much wrap in the same direction, otherwise it will look messy. Depending on your letters, you may need to cut small strands and glue them down like I have done in order for it to look neat and pretty. This is up to you, wrap that letter however your heart desires!
I wrapped the leg of the L perpendicular to the base to make my life easier! Then cut strands for the top portion like I did for the base.
Before I was completely done with the top part, I cut 3 strands of jute the length that I wanted it to hang. I braided them together, inserted them between the 2 cardboards like I did in the first step, and secured them in with a dab of glue.
Tuesday, January 28, 2014
Thursday, January 23, 2014
Valentine's Day Heart Mobile
As promised, here is an easy way to transform my Heart-Shaped Boxes that I posted earlier this week. Great decoration for any of your Valentine's Day festivities.
You can even use it as a "kissing mistletoe."
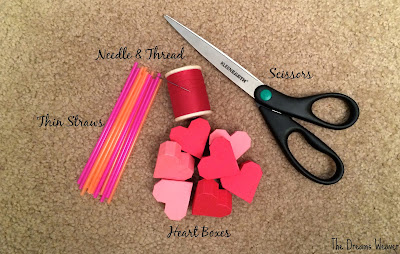
What you will need: You can even use it as a "kissing mistletoe."
Heart-Shaped Boxes
Scissors
Needle and thread (or fishing wire)
Thin straws
Clear tape or stapler
First, thread your needle and thread through one of the straws. Leave the other side of the thread still attached to the spool. This will be how we attach the hearts to the base of the mobile.
Next, take the threaded needle that you just passed through the straw and poke it through the top of the heart. Try to guide the needle through the heart and out the center bottom of the heart. Knot off that end of the thread. {The other side of the thread should still be attached to the spool of thread.}
Adjust the length of the first heart for the desired length by pulling the thread through the straw. Then, cut the thread on the other side of the straw in order to thread the second heart, like in the above step. Now you have two hearts that hang from either side of the straw.
Continue the above steps until you have the desired amount of hearts for your mobile. I found that cutting some of the straws avoiding major tangling between the different hearts. I also cut one straw really short to attach only one heart.
Attach all of the straws together and either glue, tape, or staple them in the center. Whatever method you want to get them to stick together! I used a little bit of clear tape and a couple of staples. But if you want it to not be too noticeable, maybe even hot glue.
Lastly, I used four straws that I threaded and attached to the base straw to create a pretty hanger for them. Then just tie off the tops, leave some thread hanging to hang anywhere in your house.
Monday, January 20, 2014
Heart-Shaped Boxes
As I was making all these little 3D hearts, the Nirvana song “Heart-Shaped Box” just kept coming into my head! While they aren’t technically boxes since they do not open, I went along with the song stuck in my head for the title. The songs probably stuck in your head now too!
These little hearts look complicated to make, but they are really easy. They will be the base of many of my Valentine’s Day projects since they are just so cute.
What you will need:
Colorful cardstock or paper
Sciccors
Glue stick
Ruler
Sharp edge
Download the template to print your hearts on here
First, cut out the heart template along the solid black lines.
With your ruler and a sharp edge, score along all of the dotted lines. Apply only firm pressure when scoring, as you do not want to cut all the way through the paper.
Fold all scored lines inward (this way the marked up side will be on the inside of the heart and you won’t see any of the guidelines)
Glue one side of the heart to all of the little tabs.
If you’re at this part of humming the song in your head “I've been locked inside your heart-shaped box for weeks” you can even hide your own treasure inside the box {like a gift box} to be glued in for the receiver to open.
Glue the other side down, and you are essentially done.
You can make them into conversation hearts by just writing sayings across the front of the heart in colored markers.
Stay tuned for another Valentine’s Day idea made using these hearts!
Thursday, January 16, 2014
My Top 5 Hottest Food Trends for 2014
I did some research on what the newest or most popular food trends for 2014 will be and came up with my top 5. I wonder if I will be daring enough to incorporate some of these trends into my upcoming recipes, or if the restaurants I frequent at will start adding these new trends to their dishes.
1. Eggs-cited!
Eggs placed on top of any food; burger topped with an egg, pizza topped with an egg (already saw this one on an episode of Diners, Drive Ins and Dives at a pizzeria in Minnesota.)
Eggs are nutritious, versatile, and can be worked into many dishes. It all started with the breakfast for dinner trend, which I still love, and more people are realizing how healthy eggs really are, in moderation of course.
This trend started to become popular in 2013 as well. I have seen a lot of restaurants from the shows I watch on the Food Network featuring farm to table dishes. I feel this will continue to accelerate into 2014 as more people become more eco-aware and demand less processed, or chemically modified foods. Restaurants started growing their own vegetables and herbs either in a small garden or even on the roof of the restaurant, which I think is great! With the ingredients being the freshest they can be (even being picked literally minutes from you eating it) food will taste much fresher and better for your body without pesticides or other additives.
3.Tea Time, Not Just for 4 O’clock
Green tea has filtered its way into the American culture from the Asians. Green tea has many benefits, it was used in Chinese and Indian medicine to control bleeding and heal wounds, aid digestion, improve your health, and regulate body temperature. It has a lot of antioxidants as well as polyphenols that have anti-carcinogenic effects (more on green tea benefits HERE)
Green tea can be baked into virtually any baked good, sorbet, iced cream, and my favorite Japanese dessert- green tea mochi ice cream!
4. SuperKale to the Rescue
Kale, as well as many other super foods are power-packed with nutrients, antioxidants, and Omega-3s. Other super foods include: sweet potatoes, salmon, broccoli, cauliflower, squash, beets, quinoa, flax seeds, and pomegranate.
Kales go great in salads, sauteed with spinach, or my favorite- baked kale chips!
5. Mediterranean Influence
Mediterranean food has had increasing popularity in the US in the past few years. One reason that I enjoy it is that it is rich in vegetable, lean proteins, healthy fats, and doesn't leave me feeling mad at myself after I eat it. Also, Greek yogurt is my go to breakfast. It is full of probiotics which are good for your digestive health and keep the bacteria in your gut healthy.
Tuesday, January 14, 2014
Peter Pilotto for Target Lookbook Revealed
I am beyond excited for the new Target designer collaboration with Peter Pilotto! I marked its release date on my calendar as soon as I heard about it back in September, when the 3.1 Philip Lim collection launched.
It’s ironic; I am currently sitting here writing this at my desk and I am wearing my 3.1 Philim Lim floral chiffon button down blouse! Most of my favorite items in my closet are from the Target designer collaborations.
Ever since the first collection, I have gotten at least one piece from every collection. I just love the whole idea of these collaborations. We budget minded fashionistas are able to snag a piece of fashion from designers that we
A few of my IGOTTAHAVETHIS!! from this upcoming collection:
View the full collection HERE
What are some of the pieces you plan on purchasing? What are some of the pieces from past collections that you love? I would love to hear what others love about these collaborations!
Counting down the days until the collection is on sale!

Tuesday, January 7, 2014
Upcycled Glass Bottle
My husband and I were shopping at my company’s store, and we spotted this Adult Chocolate Milk. I really wanted to get it, as I love chocolate milk {and already had an idea for the bottle to be re-purposed once we finished it!} Needless to say, it looked better than it tasted. I needed to add a ton more milk and chocolate syrup for it to taste right. It lasted longer than I expected, but we finally finished it all.
What you will need:
Any glass bottle with a lid
Start by removing both the front and back label of your glass bottle. The label on this one came off perfectly in one piece since the label was plastic not paper. But, if your glass has a paper label, just soak the label under running water and rub with your fingers.
Next, clean your bottle from whatever was in there before. You don’t want your lemonade smelling like booze! If the smell won’t come out after washing it, leave the glass overnight filled with diluted vinegar and water.
Now, fill the glass with lemonade or whatever drink you like!
Another great idea is to use it for your olive oil, so much better than the ugly store containers they come in, or even salad dressings…the ideas are endless!
Friday, January 3, 2014
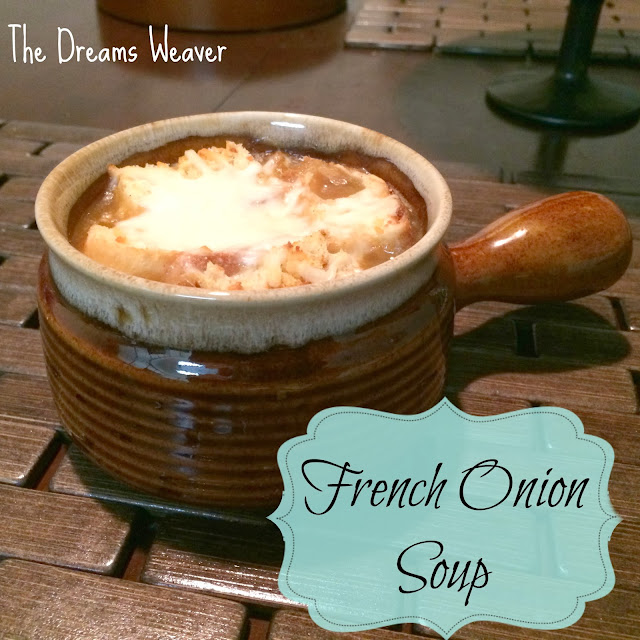
French Onion Soup
There is nothing better than homemade soup during the winter! I love French onion soup and would always get it at restaurants growing up. It has great flavors, with layers of croutons and toasted mozzarella cheese. I always thought it was so difficult to make, and would only be able to enjoy it if I went out to a fancy shmansy restaurant.
You are not going to believe how easy this is to make! And, it costs way less to make a whole pot of it than one bowl at a restaurant. I always make a GIANT pot of it and freeze part of it to enjoy later.
What you will need:
4 large onions
2 tbs. butter
2 tbs. sugar
4 tbs. flour
1 envelope of onion soup mix
1 tsp. salt
4 tbs. paprika
4-6 cups water (or you can use vegetable stock to give richer flavor)
1 package mozzarella cheese
Any leftover bread
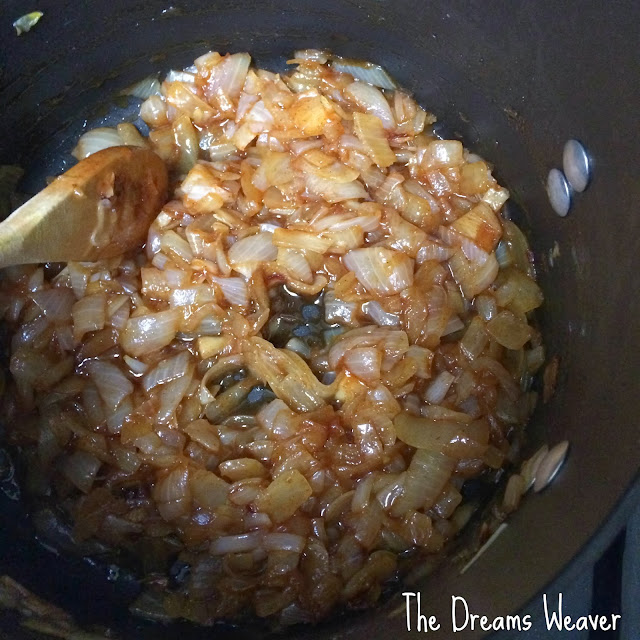
In a large pot, melt the butter on medium heat. While the butter is melting, slice up 4 large onions. Once the butter is melted, add the onions to the pot. Let the onions sweat for 15-20 minutes, stirring occasionally. I add the sugar halfway through.
Once the onions have a nice brown sheen to them add the flour, onion soup mix, salt, and paprika. Stir the mixture until it’s all incorporated and is a thick paste consistency.
Slowly add the water. I start with ½ cup at first so that the water mixes with the thick paste mixture. Once the water mixes completely, I add the remaining cups of water and stir it all together.
Let the soup simmer on medium heat for an hour with the lid propped on top, but slightly open to let steam out.
While the soup is making, cut any bread you have up into medium size squares. Sprinkle some paprika on the top. Toast on 350°F for 10 minutes.
Once the soup is ready, it’s time to assemble it in the bowls! I love using these little handled crocks like they do in the restaurants to get the full effect!
Ladle the soup into your bowls; sprinkle some mozzarella cheese, then a layer of croutons, and finally another {heaping} layer of cheese. Bake in the oven at 350°F until the cheese bubbles and turns brown.
I let the remainder of the soup cool down, then I pour into freezer safe containers to enjoy when I just don't feel like cooking. They can last months in the freezer like this.
Enjoy!
You are not going to believe how easy this is to make! And, it costs way less to make a whole pot of it than one bowl at a restaurant. I always make a GIANT pot of it and freeze part of it to enjoy later.
What you will need:
4 large onions
2 tbs. butter
2 tbs. sugar
4 tbs. flour
1 envelope of onion soup mix
1 tsp. salt
4 tbs. paprika
4-6 cups water (or you can use vegetable stock to give richer flavor)
1 package mozzarella cheese
Any leftover bread
In a large pot, melt the butter on medium heat. While the butter is melting, slice up 4 large onions. Once the butter is melted, add the onions to the pot. Let the onions sweat for 15-20 minutes, stirring occasionally. I add the sugar halfway through.
Once the onions have a nice brown sheen to them add the flour, onion soup mix, salt, and paprika. Stir the mixture until it’s all incorporated and is a thick paste consistency.
Let the soup simmer on medium heat for an hour with the lid propped on top, but slightly open to let steam out.
While the soup is making, cut any bread you have up into medium size squares. Sprinkle some paprika on the top. Toast on 350°F for 10 minutes.
Once the soup is ready, it’s time to assemble it in the bowls! I love using these little handled crocks like they do in the restaurants to get the full effect!
Ladle the soup into your bowls; sprinkle some mozzarella cheese, then a layer of croutons, and finally another {heaping} layer of cheese. Bake in the oven at 350°F until the cheese bubbles and turns brown.
I let the remainder of the soup cool down, then I pour into freezer safe containers to enjoy when I just don't feel like cooking. They can last months in the freezer like this.
Enjoy!
Subscribe to:
Posts (Atom)

